Embedding API Tutorial (AngularJS) - Part 2
Part 2: Using Connected Apps for Embedded Single Sign On (SSO) to Tableau Server/Cloud

Goal
This is part 2 of a 3 part series, on how to use Tableau’s Embedding API with AngularJS. Part 2 will build off the web app created in Part 1, and add an authentication layer. This means the end user will get prompted to login, and we can use those credentials to authenticate them to Tableau Server. Once we’ve validated them as a Tableau user, we can use Connected Apps to seamlessly render the dashboard using the user’s context. This means we’ll need to build a backend to this web app, in order to separate code that runs client side (browser) and server side (NodeJS). We’ll also add some routing to this application, using the native AngularJS routing module.
Background and Requirements
In order to complete this tutorial, you will need the following:
- Either Tableau Server (version 2021.4+) or Tableau Cloud
- If you don’t have a Tableau Server to develop against, you can always join the Tableau Developer Program, which gives you access to a free Tableau Cloud instance for use in development
- Admin rights to your Tableau Server/Cloud environment
- Install Angular CLI on your workstation
- Either complete part 1 of this tutorial series, or download the source code from part 1 and use that as your starting point
- Create the backend app
- Create the REST API endpoints for user login & creating a JWT for SSO
- Create a login form
- Setup Routing
- Dashboard Cards
Since everyone has different Tableau Server/Cloud deployments, we can make this easy to configure using environment variables. An easy way to handle this is to create a file named .env in the tableau-embed-angular folder, and define all your environment variables there. Something like the below example should work, just fill in your own details.
- PORT - what port the backend server runs on
- TABLEAU_URL - The URL for your Tableau Server environment or your Tableau Cloud site
- TABLEAU_API_VERSION - What version of the Tableau REST API to use
- TABLEAU_SITE - Name of the site that your Tableau content is on (leave blank if not using sites)
- TABLEAU_PROJECT - Instead of showing all dashboards on your Tableau Server, this app shows only those within a specific project. Specify the name of that project here
- ENCRYPTION_STRING - This can be any text. It’s used to encrypt/decrypt sensitive data that goes from the backend server to frontend client.
- TABLEAU_CONNECTEDAPP_* - Connected Apps give us a secure way to authenticate users from our Angular app to the Tableau Server, so we can embed visualizations and make REST API calls within their context. If you need help creating a connected app, check out our documentation here.
In order to run both the backend and front end web apps, we need to add some more dependencies. Run the following commands from within the tableau-embed-angular directory
Let’s also create a new files at src/backend/server.js All of our server-side code will live in this directory
Copy the below code into server.js
Now let’s think about how to run both the Angular app and the backend app at the same time. When you run ng serve its really a shortcut that does a few things:
- build the front-end code, which contains everything in the src directory
- put the built-code files in a new directory (dist/tableau-embed-angular in our case, as specified in angular.json)
- start up a web server and serve the content in that directory
- watch for changes to the src directory, and re-build if any files are changed.
In a production deployment this works a bit differently, but from a development environment’s perspective each web app (front-end and back-end) has it’s own web server which means they will run on different ports. To make this seem like one complete application, we can use a proxy to route traffic from localhost:4200/api (the front-end app) to localhost:8080 (the back-end app). Create a new file at tableau-angular-embed/proxy.config.json and copy the below code
Now we can run two commands to get our development environment working. Each will watch a different folder for changes, and rebuild/restart when changes are made.
ng serve —proxy-config proxy.config.json

nodemon —watch src/backend src/backend/server.js
We could run these from separate terminals (since they are both long-running commands), but an easier way to work is to combine them both into a single command. Open tableau/embed-angular/package.json and look for the scripts section near the top. This lists out the npm run commands you can use. Lets add commands for both ng serve and nodemon.
Now we can run both together by running this command:
npm-run-all -l -p dev-angular dev-express
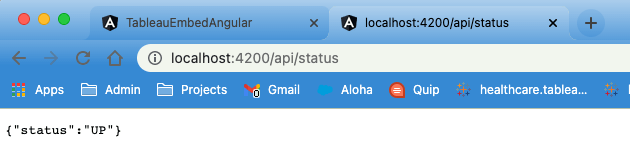
Now, you should be able to access both the front-end application at http://localhost:4200 and the backend application at http://localhost:4200/api/status
Note that these commands watch for changes to our code and automatically restart the services, so anytime we update our code the web app should be automatically updated. We’ll cover how to deploy this in a production environment later, but now we should be able to continue developing code for both the front-end and back-end of this web app.
In order to authenticate as the end-user, we need two API endpoints:
- /api/login - take in a username + password, authenticate via Tableau, and return the auth credentials (API token, site id, etc)
- /api/jwt - When we render a dashboard using the Embedding API, we can pass along a JWT that includes the security context of a given user. This JWT needs to be created server side (since it needs a consumer id & secret), and passed back to the client side for rendering
Let’s create the login endpoint first. We could put all this code in /tableau-embed-angular/src/backend/server.js, but that would get crowded over time. Instead let’s create a new file at /tableau-embed-angular/src/backend/login.js and put all the business logic there.
This file defines a handler for a POST request to / with a payload of {“username”: “some-user”,“password”:“some-password”}. In our server.js file, let’s create a reference to it and map /api/login to this route. Just below the /api/status section, copy the below code the include the login route.
At this point, you’ll see an error from express complaining that it cannot find module './tableau-helper'. This is because our login.js file has a reference to a helper class and we haven't defined it yet. Create a new file at backend/tableau-helper.js and copy the below code.
Since each API endpoint will get its own file, it makes sense to create a helper class that contains code that is reused across different API endpoints. This file provides some helper functions in a central place, as opposed to re-writing the code in each endpoint file. We can test that our login endpoint is working by using Postman
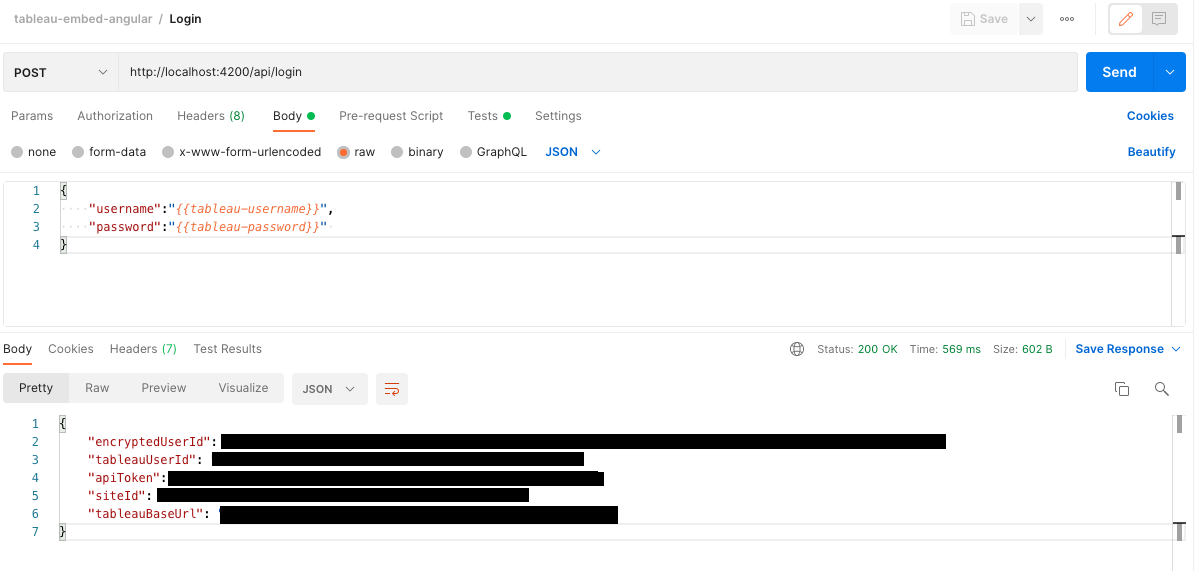
So in order to login, the AngularJS app (frontend) needs to make an POST request to /api/login and pass along the username and password. Our backend server will make a REST API call to Tableau with those credentials, and return some auth details to the frontend (for making future API calls).
Next, we need the JWT endpoint so lets create a new file at backend/jwt.js
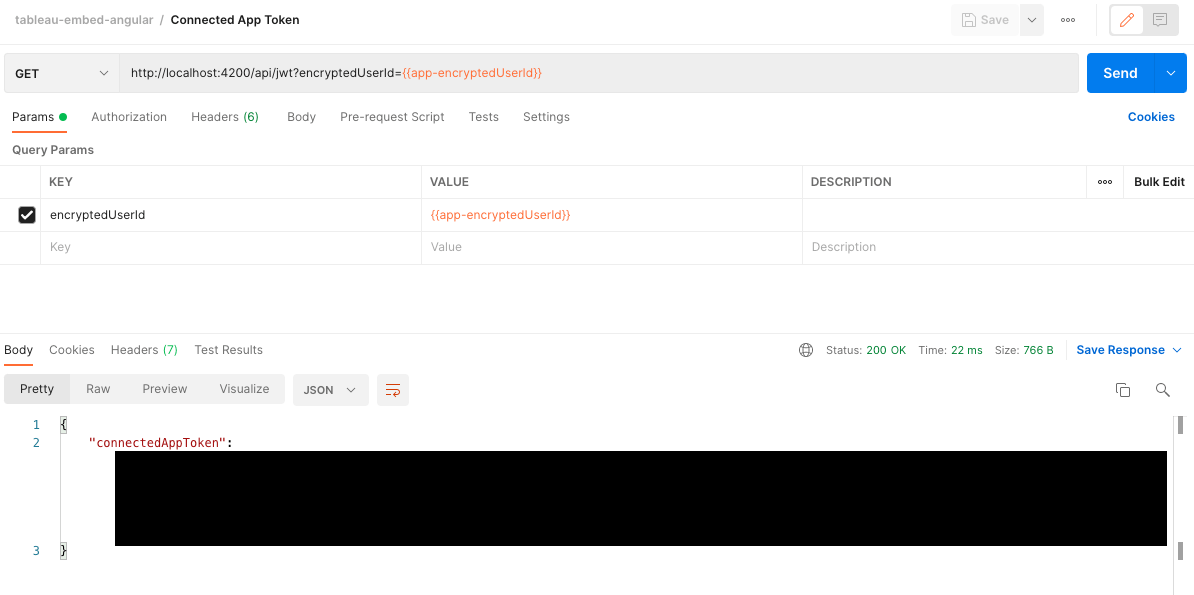
Here, we’re defining an API endpoint that takes in a user id, and returns a JWT. We also need to add this route to server.js
Now we’ve mapped GET requests to /api/jwt to our new route. Let’s test it using postman (note that you need to get the encryptedUserId from the login API call first).
We’ve got our backend server working, but the frontend isn’t using it yet.
commDefine interface and helper class
Since we need to use the authentication details in several places, it makes sense to create an Interface for what an Auth object will look like. Create a new file at tableau-embed-angular/src/app/common/models/authentication.ts and copy the below code:
We should also create a helper class for working with this interface. Create another new file at tableau-embed-angular/src/app/common/user-session.ts and copy the below code:
This puts all the business logic for creating and storing session information in a single place. There is a method to create a new Auth object (which includes api tokens, ids, etc) as well as methods to save/load/delete this information from the end user’s localstorage. This means once a user has logged in, their browser can remember their session information and reuse it next time without needing a login. Of course, we include an expiry date in here as these sessions are only valid for so long.
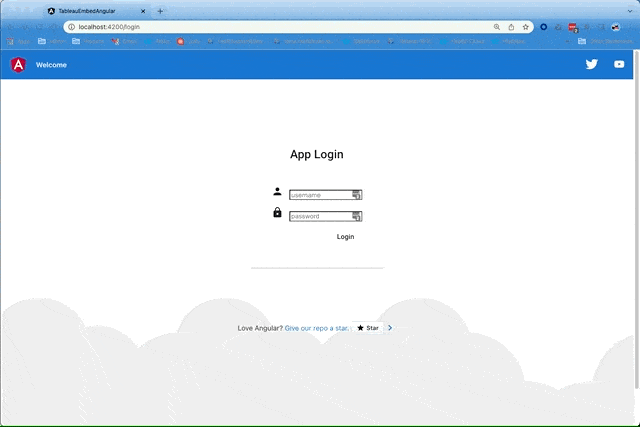
Login Page
Let’s create a few more Angular components: one for a login page, and another to list out our dashboards.
Open up login-page/login-page.component.ts first, and let’s add some imports. We will use Angular forms to render the login form, axios to make API calls (to the backend server), and our SessionHelper class to manage the user’s session state. We might as well import Router too, since we’ll need that eventually.
Update the constructor to include a reference to Router
Next we should add some public properties in the LoginPageComponent class, that will get referenced by the HTML template
We also need a method to handle when the user clicks the Login button, and a private method that makes the API call to /api/login.
Next, open login-page/login-page.component.html and replace the contents with this code:
This is creates a login form with inputs for username and password. Also if the component has anything in the error property, it will display the message in red. Notice it has a ngSubmit handler on the form, which references the submit function from login-page.component.ts. Last step here is to add some styling to login-page/login-page.component.css
So we’ve defined our login page, but it doesn’t show up within the app yet. Let’s create a router that can decide whether to send the user to the login page, or to the dashboard cards page (and from the list of dashboards, navigate to an embedded dashboard).
This will create a new file named app-routing.module.ts and add a reference to it in app.module.ts. Let’s start by opening app-routing.module.ts and add some imports. We need RouterModule and Routes from Angular’s Routing module, as well as references to the components we've created.
Route Guard
Before we define a list of routes that are available, we want to lock this web app down and ensure users can only navigate to a dashboard if they have logged in. To enforce this business rule, we can create a Route Guard.
This guard just needs to check and see if the user has a valid session, and if not it can deny access to specific routes. Since we created session-helper.ts to manage user sessions, this should be easy. We start by importing that helper class in login.guard.ts
We also want to redirect users to the login page, if they try and navigate to a page that’s restricted so add an import for Angular’s Router
We will need this defined within a constructor (inside the LoginGuard class)
And then we just need to define our business logic within the canActivate method. It defaults to a return true, so swap that out with the below code:
Define Routes
Now that we've defined a guard, we can go back to app-routing.module.ts and define a list of valid routes. Notice all routes have a reference to the LoginGuard, except the login page. So if an unauthenticated user tries to navigate to any route, they will always get re-routed to the login page.
app-routing.module.ts will also need to import the LoginGuard we just created
and we’ll need to change @NgModule to include our list of routes.
Start using the router
If you try and access the app in your browser now, you’ll see you’re being redirected from http://localhost:4200/ → http://localhost:4200/login. The tableau dashboards will still be visible, though, because we haven’t changed anything in app.component.html to use our new router. First open app.component.ts and import the Angular router and our SessionHelper
import { Router, NavigationEnd } from '@angular/router';
import SessionHelper from './common/user-session';
The AppComponent class is basically empty, so replace it with the following:
This adds some handles a few use cases.
- Whenever the route changes (navigating from one page to another), figure out if the user’s session is still valid and update the userLoggedIn property. We can use this to determine whether to show a logout button at the top of the page.
- Defines a logout method, for when the user clicks on the logout button
- Since AngularJS uses single page applications, navigating between pages doesn’t actually reload the page (just swaps out contents on the same page). So if you’ve scroll far down the page and then clicked a navigation button, you will still be scrolled all the way down even if the content changes. The ngOnInit method is subscribing to the router events, and will always scroll back to the top of the page when the user clicks on a navigation button.
Now we can open app.component.html and replace the <app-tableau-embedded-viz> tags with the following:
Let’s also add in the logout button in app.component.html. Add the below code at the end of the toolbar div
From your browser, you should be able to use the login form (you’ll need valid user credentials from your Tableau Server). Once you login, you should see the the placeholder text for the dashboard cards component. Note the logout button at the top right, if you click that your session will end and you’ll be redirected to the login page.

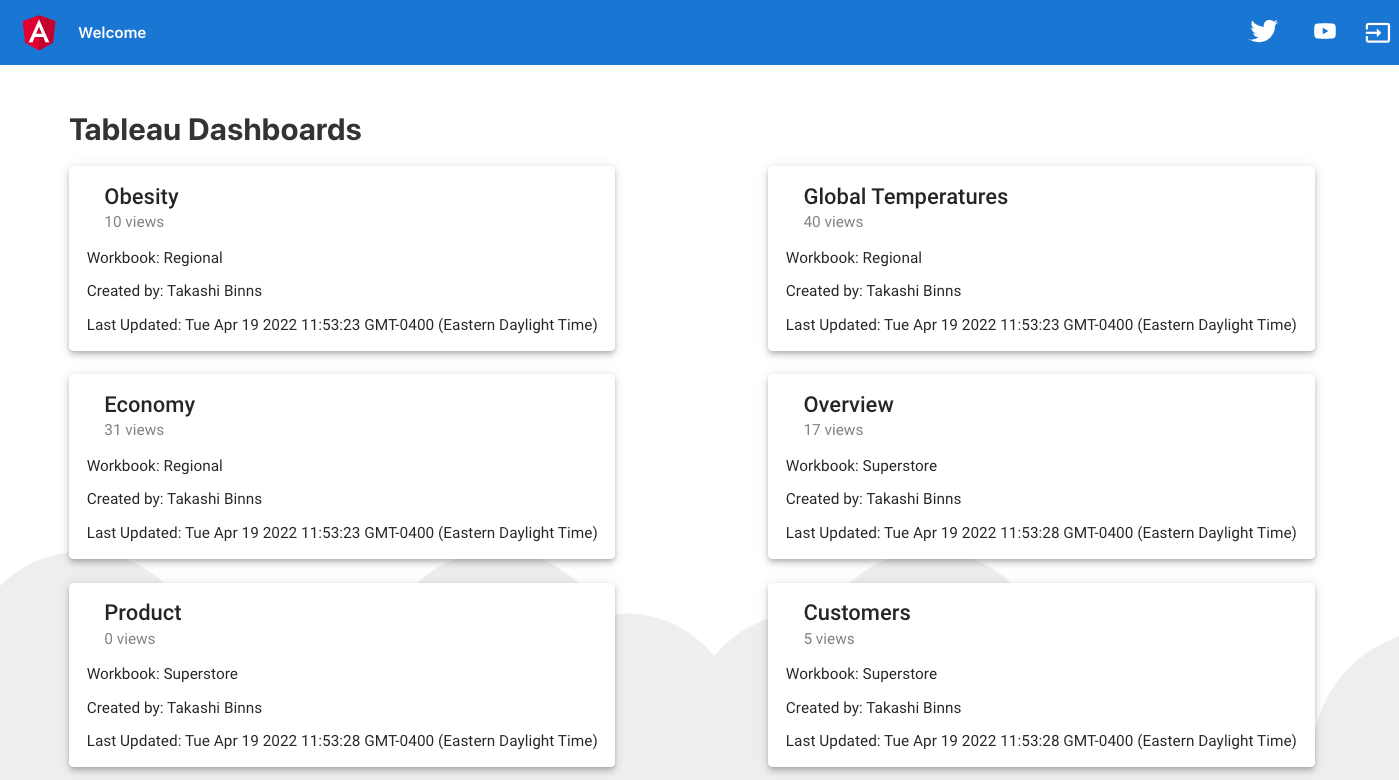
This dashboard cards component’s job is to display a list of the possible dashboards available to view in card form. Clicking on a card should take us to a page with only the embedded dashboard.
Add API endpoint for fetching dashboards
Since we want to display a list of dashboards, why not get this information straight from Tableau? Create a new file at tableau-embed-api/src/backend/dashboards.js
This defines 2 routes
- /api/dashboards - fetches all dashboards from Tableau Server/Cloud that are in a specific project (set from TABLEAU_PROJECT environment variable). Returns an array of dashboard objects
- /api/dashboards/:id - fetches information about a specific dashboard, based on its Tableau LUID. Returns a single dashboard object
Now we can update tableau-embed-api/src/backend/server.js to include those routes.
We’ll want to handle work with the dashboard objects returned from our API in a few places, so let’s create a helper class to take in an object from the API and create a TableauDashboard based on our Interface. Create a new file at tableau-embed-api/src/app/common/tableau-helper.ts with the following code:
The main job here, is the take in a generic JSON object returned from the Tableau REST API and convert it to a defined TableauDashboard object.
Create card for each dashboard
Now that we have the backend setup to fetch dashboard data from Tableau, let’s update dashboard-cards/dashboard-cards.component.ts to make those API calls. Add an import for Angular Router, axios (for making REST API calls), the TableauDashboard & Auth interfaces, our Auth session helper, and our new TableauHelper class.
We need to define the router within the constructor and add a public property that defines the list of Tableau dashboards that’s available.
We also need a private method to fetch the list of dashboards from our backend server.
Now we can call this method from our ngOnInit method. One thing that will stick out is the async keyword in front of ngOnInit. Since REST API calls are asynchronous, we can use the async/await syntax to ensure our code waits for the API call to complete before moving forward with the rest of the code.
And we’ll also need a public method for when a user clicks on a dashboard.
Let’s also add a public method to format the Last Updated date of the dashboard. Our TableauHelper class has a date formatter method already, we just need a public method that makes it available to the HTML template.
Now we need to update the dashboard-cards.component.html template to incorporate those properties/methods
and specify styling in dashboard-cards.component.css
Now we should see a card for each dashboard from Tableau, with some additional information displayed.
Update tableau-embedded-viz component
If you click on a dashboard from the above screenshot, it won’t actually load properly. Let’s update the tableau-embedded-viz component to take in a dashboard LUID and render it on the page. Open tableau-embed-api/src/app/tableau-embedded-viz/tableau-embedded-viz.component.ts and add the following imports.
We also need some more public properties
This component now gets sent a dashboard LUID, so we need to make a REST API call to get more details about that dashboard. We’ve already setup a route to handle this on the backend, so let’s add a method to fetch this via API.
In order to get that dashboard LUID, we need to read it from the route. Lets update our constructor to look like this:
constructor(public dialog: MatDialog, private router: Router, private activatedRoute:ActivatedRoute){}
We should have everything we need, so we can update our ngOnInit method to call the methods we’ve defined above. We’ll use the same async/await syntax that we used earlier, to ensure we wait for the API calls to return before executing all our code.
We also have that exit button in the toolbar which calls the closeDashboard method. This is an empty method still, so let’s add a command to re-route the user back to the home page.
The next thing to do is update the HTML templates. Open tableau-embedded-viz.component.html and change the <tableau-viz> tag to include the connected app token.
Since we did this for dashboard cards, let’s also add a public method to format dates in the TableauEmbeddedVizComponentDialog class
And open tableau-embedded-viz-details.component.html to change this line
<p>Created by {{data.owner.fullName}} ({{data.updatedAt}}) </p>to this
<p>Created by {{data.owner.fullName}} ({{dateFormatter(data.updatedAt)}}) </p>
We had used a placeholder object to verify that info popup was working, but now we have a real TableauDashboard object to work with. Update the openDialog method in tableau-embedded-viz.component.ts and change that method to look like this:
Test SSO using Connected Apps
At this point, we should have a working Angular app, that includes the following pages:
- /login - Login page, where users can authenticate via Tableau. All page loads default to here, if the user doesn’t have a valid session
- /home - Shows a list of cards, that represent dashboards hosted by Tableau. There is some basic info about the dashboard on each card, and they are also clickable to view an emdedded dashboard
- /dashboard/:id - Displays a specific Tableau dashboard embedded into the web app. This includes single sign on using connected apps, so that the user doesn’t get prompted for a login by Tableau
Troubleshooting
Single Sign On
If you are getting some weird error messages from Tableau when using connected apps, check out the troubleshooting section on Tableau’s documentation for more details on what the error codes mean.
No such file or directory error
If you see an error message in the logs that looks like this: [dev-express] Error: ENOENT:
no such file or directory, stat '/<some>/<local>/<path>/tableau-angularjs-sample/tableau-embed-angular/dist/tableau-
embed-angular/index.html
It means you have your wildcard route handler defined BEFORE your actual routes. Express goes in order of definition, so you need to have the below code block as the last defined route (after all your other routes like jwt.js, dashboards.js, etc)
Next Steps
Last updated: August 18, 2023