Embedding API Tutorial (AngularJS) - Part 3
Part 3: Build a rich user experience for embedding with Tableau REST API.

Goal
This is part 3 of a 3 part series, on how to use Tableau’s Embedding API with AngularJS. Part 3 will build off the web app created in parts 1 & 2, and use Tableau’s REST API to provide a richer UX to our web app.
Background and Requirements
In order to complete this tutorial, you will need the following:
- Either Tableau Server (version 2021.4+) or Tableau Cloud
- If you don’t have a Tableau Server to develop against, you can always join the Tableau Developer Program, which gives you access to a free Tableau Cloud instance for use in development
- Admin rights to your Tableau Server/Cloud environment
- Install Angular CLI on your workstation
- Docker (optional)
- Either complete part 1 and part 2 of this tutorial series, or download the source code from part 2 and use that as your starting point
Note: In part 2 of this tutorial, we defined our environment variables at tableau-embed-api/.env. If you are starting from the source code from Github make sure to create that .env file in order for your web app to know where to find Tableau Server/Cloud.
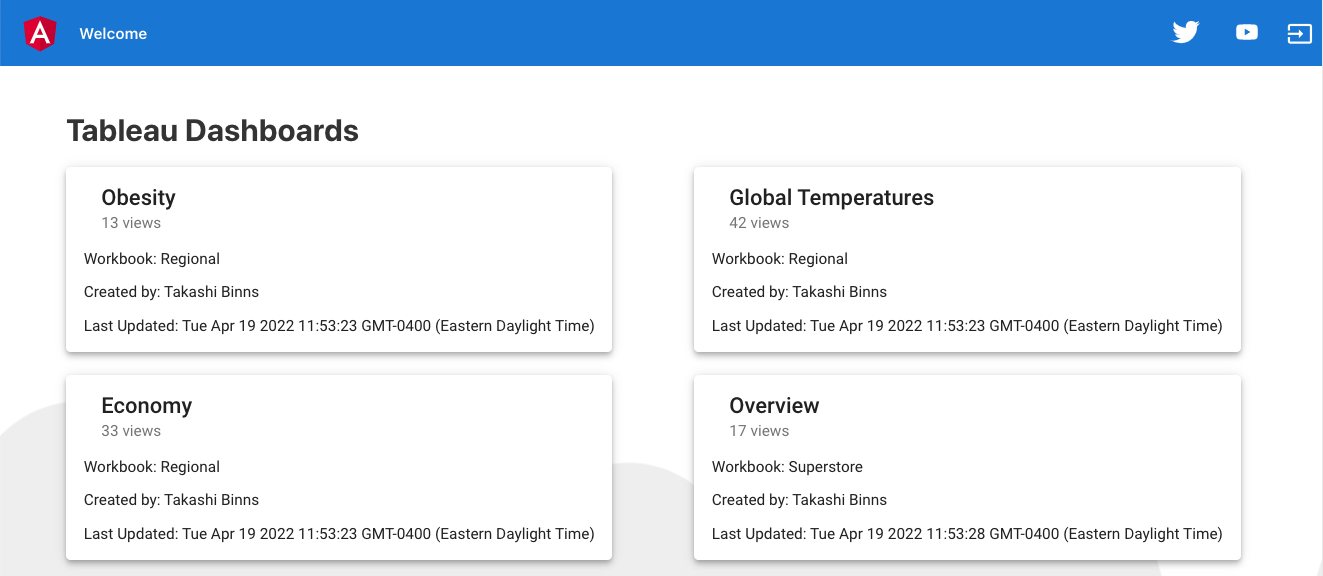
At this point, we should have a web app that looks like the image above. Each dashboard is represented by a card with some information about it (name, workbook, owner, last updated date). It would be nice if we could show a preview of the dashboard as well.
Add backend route
Tableau does have a REST API endpoint for retrieving a preview image of a given dashboard, so let’s use that to display preview images within each card. That API call returns the image as a binary string, so we’ll need another library in order to get a base64 encoded version of that.
npm install btoa
Similar to how we made the REST API calls to get the list of dashboards in Part 2, we’ll need a new Route in our backend server. Create a new file at tableau-embed-api/src/backend/backendPreview.js.
This new route will take in a view and workbook ID, and use that to make the REST API call to Tableau for the preview image. It will return the image data in base64 so that we can use it right away in an <img> tag. We also need to add the Route to the Backend section of tableau-embed-api/src/backend/server.js
const routeDashboardPreview = require('./dashboardPreview');
app.use('/api/dashboardPreview', routeDashboardPreview);
Update frontend
Now we can update our dashboard-cards component to make the API call and place the image inside each card. Start with tableau-embed-api/src/app/dashboard-cards/dashboard-cards.component.ts. First we need to add a new private method to the DashboardCardsComponent class, which will call our backend Route to get the base64 encoded image, and update the dashboard object within this component.
And we need to call this method from our getDashboards method. Right after we define the newDashboard object, we can add another line below
// Make API call to fetch the dashboard's preview image
this.getDashboardPreview(auth, newDashboard.workbook.id, newDashboard.id, index);
This means our getDashboards method will return the list of dashboards to display, and for each one it will make another API call to fetch its preview image. Notice we aren’t waiting for each preview to complete, as this may take a while if we have a lot of dashboards. Instead we just kick off the getDashboardPreview method, and when it returns we will update the preview property of that dashboard. This way the cards can render right away and when the image is returned, it will get rendered later. This is a fast API call that should only take a second or two, but we don’t want to pause rendering just in case some of these API calls take longer.
You may have noticed our TableauHelper.createDashboard method actually puts in the path to a placeholder image (assets/loading.gif) by default, so the user will see a loading image if the preview image takes a while to return. We just need to drop any image into the assets folder with that name. If you want to get a fancy loading gif, check out loading.io to download a free image. We also need to add an image tag to our HTML template in dashboard-cards.component.html that specifies an <img> tag within each card. Add the below <img> tag right after the <mat-card-header> tag.
<img mat-card-image class="tableau-preview" src="{{dashboard.preview}}" (click)="viewDashboard(dashboard)">
<img mat-card-image class="tableau-preview" src="{{dashboard.preview}}" (click)="viewDashboard(dashboard)">When you check out the app in your browser, you should now see a preview image for each card.
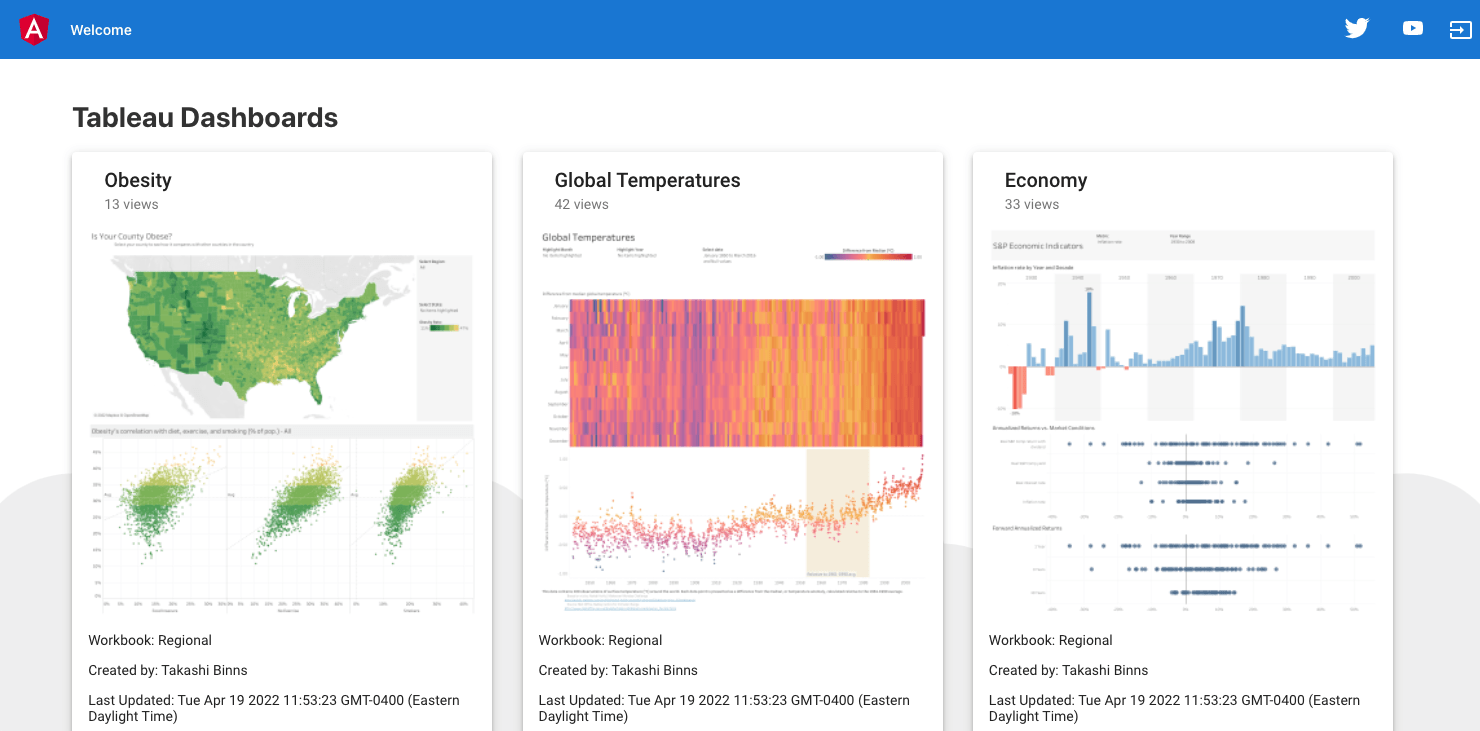
Tableau has a concept of Favorites, which means users can mark dashboards they use often to make them easier to find later. We can make a better user experience, by incorporating this functionality within our app. Similar to the dashboard preview image functionality, we need to add a Route on the backend and then update the frontend.
Add backend route
Lets start by creating a new file at tableau-embed-api/src/backend/dashboardFavorite.js
The above code defines two routes:
- GET /api/dashboardPreview - return a boolean to indicate if a specific dashboard is already marked as a favorite
- POST /api/dashboardPreview - Tell Tableau to save a specific dashboard as a favorite
We also need to update tableau-embed-api/src/backend/server.js to include the new routes
const routeDashboardFavorite= require('./dashboardFavorite');
app.use('/api/dashboardFavorite', routeDashboardFavorite);
These new Routes allow the frontend to work with a specific dashboard, but we should also update the /api/dashboards Route to include the favorite status as part of the list of dashboards to return. Open tableau-embed-api/src/backend/dashboards.js and add a new private method (near the top of the file)
Now we can update our /api/dashboards route to look like this:
The change is that we first get the list of favorites, and then when we get the list of dashboards we can loop through and mark each one as a favorite (based on our favorites list). We also needed to add the async syntax at the method definition since we used await. Also in order to get a list of favorites, we need the logged in user’s Tableau ID.
Updating Dashboard Cards component
Let’s start by updating the DashboardCards component at tableau-embed-api/src/app/dashboard-cards.component.ts. First, we change the backend endpoint to require a tableau user id so update the axios options to include it from the auth object.
// Define option
const options: AxiosRequestConfig = {
'method': 'GET',
'url': `/api/dashboards?apiToken=${auth.apiToken}&siteId=${auth.siteId}&tableauUserId=${auth.tableauUserId}`}
Now we can add in an icon to display on each card, but only if that dashboard is a favorite. Within dashboard-cards.component.html update the <mat-card-title> tag to look like this:
<mat-card-title><mat-icon *ngIf="dashboard.isFavorite" class="favorite-icon-card">favorite</mat-icon>{{ dashboard.name }}</mat-card-title>and add some more CSS styling to dashboard-cards.component.css
/* Favorite icon */
.favorite-icon-card {
color: #3f51b5;
left: 5px;
position: absolute;}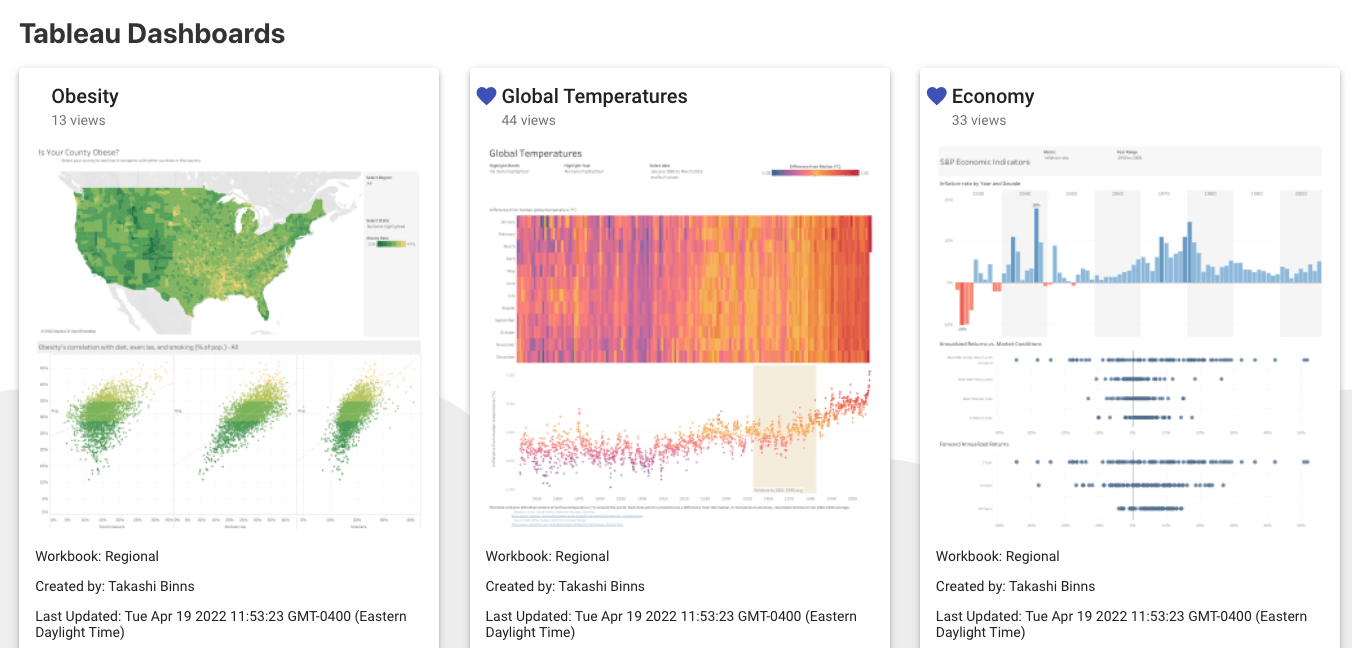
Update Tableau Embedded Viz component
In addition to displaying the favorite as an icon on the dashboard cards page, we should also provide a button on the embedded viz page so that a user can check or uncheck a dashboard as a favorite. Let’s start with tableau-embedded-viz.component.ts and update the getFavorite and setFavorite methods.
Our favorite button already has a click handler for the setFavorite method, and our ngOnInit method already makes a call to getFavorite so we should be all set. In your browser, you should be able to test it out. If you open a dashboard that has the favorite icon in the title you should see a filled heart icon in the embedded viz toolbar. Clicking on that icon will trigger an API call and remove it from the favorites. If the dashboard is not marked as a favorite, the icon will be hollow and clicking it will mark it as a favorite.

Exporting the dashboard, the last feature we will add, is the ability to export the dashboard as a PDF. We can leverage Tableau’s query view pdf REST API endpoint to do this. Just like the last few features, we need a Route for the backend server and then we can update the frontend to use the route.
Add an export dashboard route
Create a new file at tableau-embed-api/src/backend/dashboardExport.js
This just calls the Tableau REST API to get the PDF, and forwards it along. The only extra thing we need to specify in the response is that the content type should be application/pdf. Let’s also add the route to tableau-embed-api/src/backend/server.js
const routeDashboardExport= require('./dashboardExport');
app.use('/api/dashboardExport', routeDashboardExport);
Update the Download button
Now that our API backend is setup, we can write in our business logic into the export button’s click handler. Update the downloadPdf method in tableau-embed-api/src/app/tableau-embedded-viz/tableau-embedded-viz.component.ts
This makes an API call to our backend, asking for the dashboard as a PDF. Once we get the PDF back, it just exists as raw data. In order to download it as a file we convert it into a Blob, add an anchor tag (<a>) with the data as the href, click on it programmatically, and then remove it from the page. There’s a good blog post here, which explains this methodology in detail.
Dockerizing your Application (optional)
At this point, our application is complete! But how do we actually deploy this in production? We could just run ng build, which builds the Angular app and outputs it as static files, then host those files from Node/Express. Let’s make this a bit more modern, though, and create a docker container out of our web app. This will make things simpler when deploying to cloud providers like AWS, GCP, Azure, etc.Creating a docker container is actually pretty straightforward for a web app like this. We just need to create a new file at tableau-embed-api/Dockerfile and copy the code below
FROM node:16
WORKDIR /usr/app
COPY *.json ./
COPY src ./src
RUN npm install -g @angular/cli@latest
RUN npm install
RUN ng build
CMD [ "node", "src/backend/server.js" ]
Dockerfiles are just a set of instructions that tell docker what needs to happen in order to build the container. We start from a base image (node:16), copy the json files over, run the ng build to create the Angular static files, then run node src/backend/server.js to host the web app.
Assuming you have docker installed and running on your workstation, run the following command to build the container image:
docker build . -t tableau-embed-api-angular
This will take a few minutes, as it has download all dependencies from package.json and then run the ng build command. Once your container is built, though, it should start up very quickly. You can run it locally by using a command like this:
docker build . -t tableau-embed-api-angular

Troubleshooting
Docker build fails
You may run into an error message while trying to build the docker container.
docker: Got permission denied while trying to connect to the
Docker daemon socket at unix:///var/run/docker.sock:
If this happens you will likely need to run the docker build command as sudo, like this:
sudo docker build . -t tableau-embed-api-angular
Next Steps
Congrats, you’ve reached the end of of this tutorial series. Hopefully you’ve managed to build a full-featured Angular app that shows how to embed using Tableau’s Embedding API. There are other features you could bring into this app if you’d like, check out the Tableau REST API documentation and Embedding API documentation for more ideas on how to make your web app even better. The complete source code for this tutorial can be found here.
Zuletzt aktualisiert am: 15 August, 2023