Expanding beyond 16 columns without header concatenation


Header Concatenation: This was a new problem for me.
Heck, it was a new word for me up until recently.
Janet Shen, one of the incredible Viz Magicians from Tableau Professional Services sent me a great "How To" guide for overriding our default settings and I couldn't wait to share it. The useful content is ALL her. The silliness is all me. Hope you find this as helpful as I did!
Click inside to get the step-by-step tutorial.
Here at Tableau, we like to be helpful. As part of that, we have built our tools to steer you toward visual analytics best practices in subtle ways—and sometimes in not-so-subtle ways. Header concatenation is one of those less-subtle examples.
As you may already have learned, Tableau Desktop will concatenate row headers if there are more than six discrete (blue) fields on the Rows shelf.
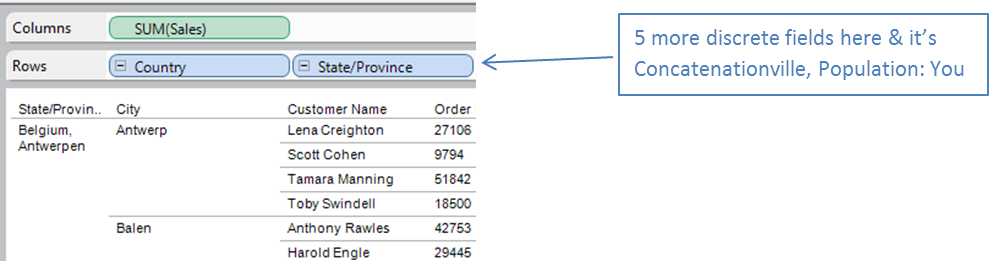
We do this because we have found that using more than six separate fields can result in cluttered, hard-to-read visualizations.
However, being a group of rule-breakers and rebels ourselves,we do understand that sometimes you need to color outside the lines, man.

This six-field limit can be increased by adjusting the “Maximum levels of columns labels” setting under Analysis > Table Layout > Advanced.
Our knowledge base has a great article about doing exactly that. However, this setting can only be increased to a maximum of 16 column labels.
But what happens when your boss comes to you with a big ol’ Excel report and demands that you replicate that report in Tableau? You know it’s not going to be pretty. You also know that when your boss’s forehead vein is throbbing like that…it’s not the moment to argue Visualization Best Practices. You’ve got to make this work.

Ok, first of all, we need to say that we don’t recommend this. We really don’t recommend this. We have strong feelings about this, as a matter of fact.
But we trust you. We know that YOU know when breaking the rules is that right answer.
::deep breath::
Okay. Here we go:
To work around maximum columns, users can take advantage of these two facts:
- You can stack unlimited numbers of continuous fields (green) on the Columns shelf.
- With Multiple Mark Types enabled, a different label can be applied to each measure.
Here are the 10 steps to achieve a fully customizable text table that exceeds sixteen columns in size:
1. Create a set that combines of all the discrete fields currently on the Rows shelf. This set will define how many rows are created for the table’s contents.
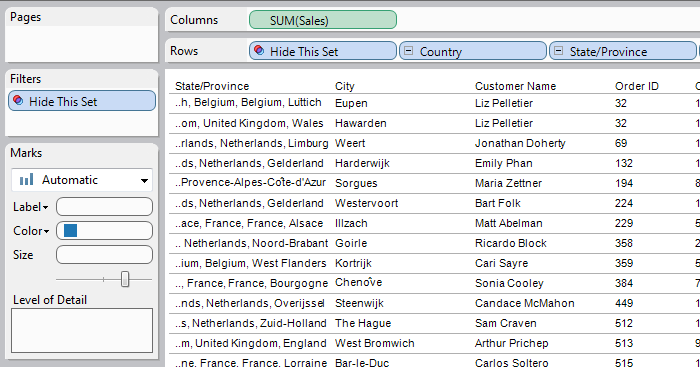
2. Use Shift + Click to select all the other discrete fields on the Rows shelf. Drag them to the Level of Detail shelf.
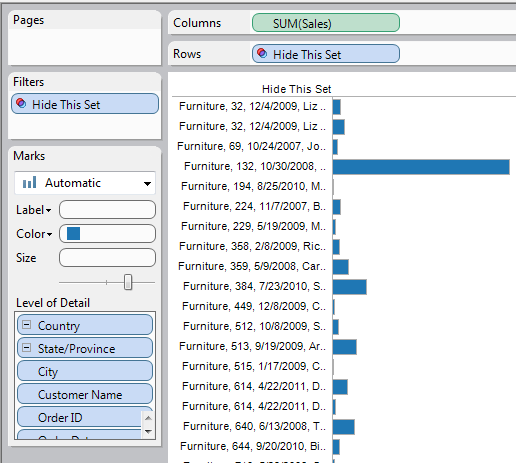
3. Create a calculated field that is just the number 1.

4. Right-click-drag this field to the Columns Shelf and select the MIN() option.
On the Marks card, click Label > Show mark labels.
Notice how all bars (and subsequently, all labels) are aligned, compared to a field that contains varying data.

5. Verify that the mark type is set to “Bar,” not “Automatic.”
Open the Marks Card menu and select Multiple Mark Types.
Remove Measure Names from the Color shelf.
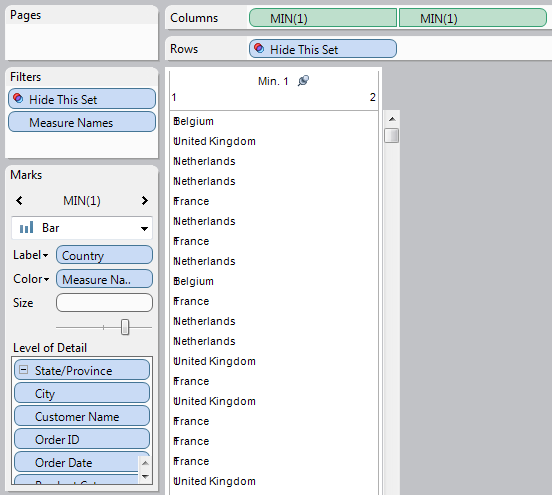
6. Double-click the axis for Min. 1 and set the range to Fixed: 1 to 3.
Clear the Title completely.
Go to the Tick Marks tab and select “None” for both major and minor tick marks.
Click OK.
7. Hold the Ctrl key and drag MIN(1) on the Columns shelf on top of SUM(Sales).
Double-click the axis of this new MIN(1) to change the axis range to a fixed 1-2.
Change Title to the first field name.
Go to the Tick Marks tab and select “None” for both major and minor tick marks.
Click OK. Right-click the second MIN(1) and select Dual Axis.
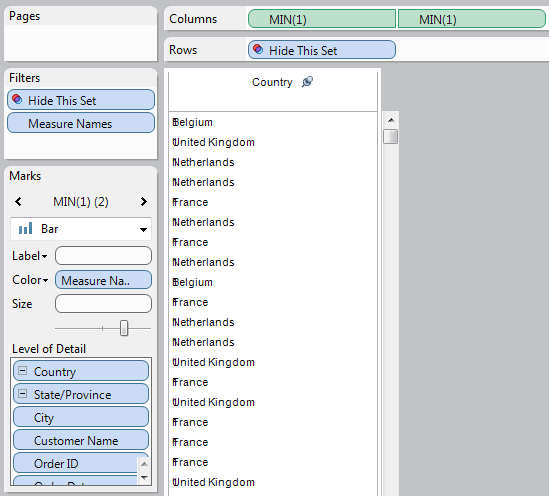
8. Click the leftmost MIN(1) on the Columns shelf or navigate to it using the arrows on the Marks card.
Drag the first discrete field from the Level of Detail shelf to the Label shelf.
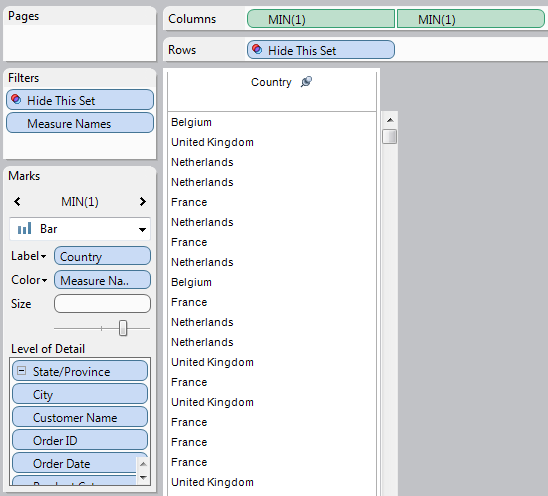
9. Click the rightmost MIN(1) on the Columns shelf or navigate to it on the Marks card.
On the Marks card, open the Label menu and deselect “Show mark labels.”
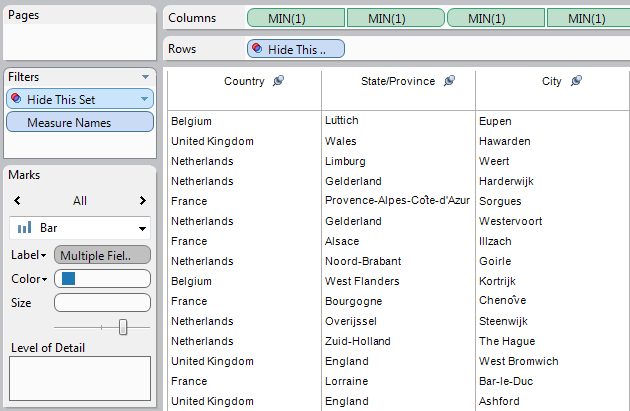
10. Add more dual axis pairs of MIN(1) on the Columns shelf, progressively dragging more fields from the Level of Detail shelf to the Label shelf.
When done, navigate to All on the Marks card and remove “Multiple Fields” from the Level of Detail shelf and clear the Color shelf, which can now be used to conditionally format the cells in one column at a time.
And that’s it! You did it! That was really... kind of a hidden maze, eh? Sorry about that, but we don’t want people just stumbling onto this sort of advanced maverick stuff.
Basically, we hope that you’ll keep in mind when you find yourself having to dig three, four, five layers deep to try to override our defaults… to please just stop and think about if you want—if you really, really want—to be doing what you’re doing.

เรื่องราวที่เกี่ยวข้อง

5 Ways to Use Tableau Public to Achieve Your Goals
 มกราคม 11, 2025

World Mental Health Day: Elevating Awareness Through Data Visualization
 ตุลาคม 10, 2024
From TV Screens to Tableau: Visualize Your Favorite Shows with IMDb
 สิงหาคม 31, 2024