How to Use Your Author Profile


When we created the new Tableau Public web experience, we gave you gorgeous new author profiles. Your author profile serves not only as a place to display your vizzes, but also to organize and edit them. Let’s take a look at all the pieces of your author profile and what you can do with it.
Editing Details
When you are logged in and looking at your author profile page, the first thing you’ll see at the top next to your name is an edit button. Clicking this will allow you to edit all the personal information on your profile. You can change your picture, name, organization, location, add social media links, and write a little bio. Let the community know who you are and where to find you!
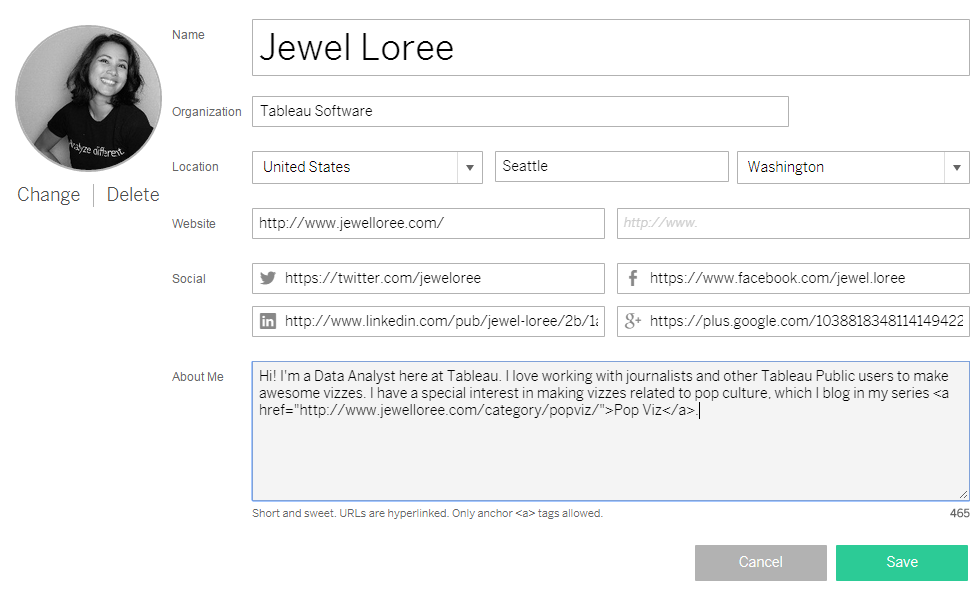
Tell the world who you are by editing your details.
Viewing Your Profile
You may have noticed a toggle switch in the top right that says “View profile as” and has buttons for “Me” vs “Others”. When viewing your profile as yourself, you can see everything you’ve saved to Tableau Public, even if it’s hidden.
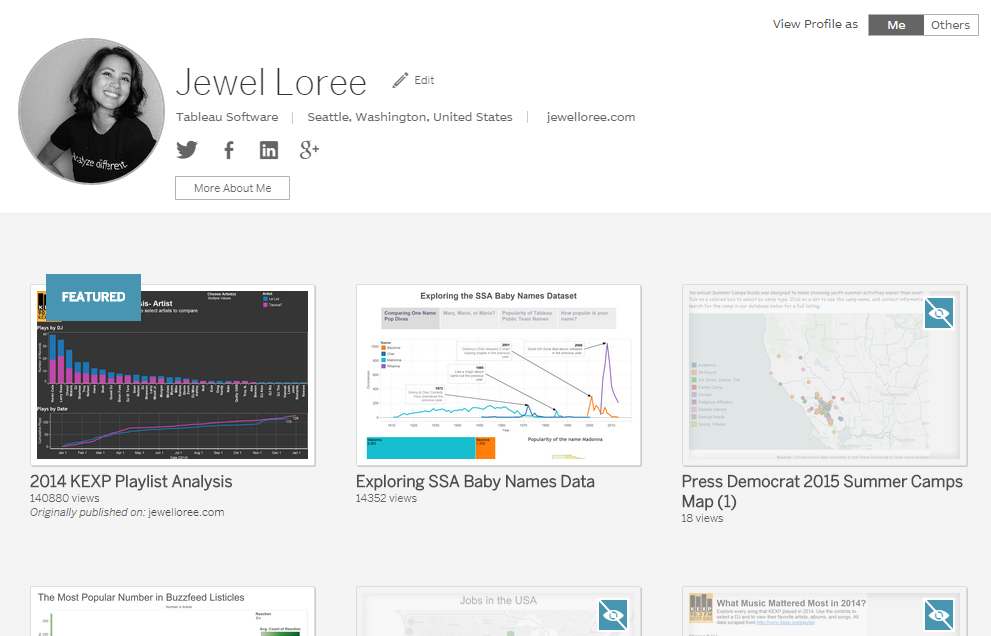
View your profile as yourself.
Viewing as others, you can only see non-hidden posts. This gives you an idea of what everyone else sees when they look at your profile. Which brings us to our next point…

View your profile as others.
Hiding, Deleting, and Viewing Workbooks
Everything you need to do to a viz can be done from your author profile. When you view your profile as yourself and hover over a viz, some buttons pop-up that show what you can do with them.
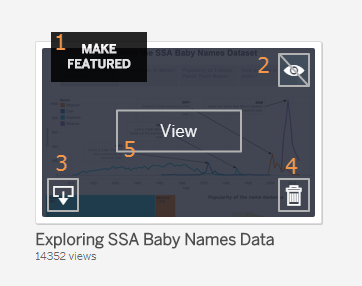
Managing workbooks on your author profile
- Make featured: Clicking this button will set this viz to be your “Featured Viz” which is the first viz displayed on your profile.
- Hide: This button hides the viz from your profile. It still exists on Tableau Public and has a viz homepage, it just isn’t displayed here.
- Download: This button lets you download your viz to your computer so that you can open and edit it in Tableau Desktop-Public Edition.
- Delete: This button permanently deletes your viz from the Tableau Public servers and removes it from your profile.
- View: This button will open up the whole viz so you can see the interactive version. It will also take you to a page where you can edit the details of your vizzes.
Editing Workbook Details
After clicking “View” on a workbook, you’ll be taken to a page similar to the Viz Homepage where you can edit the details of the page. Just click the Edit Details button in the top right. It’ll jump you to the fields you can edit below the viz.
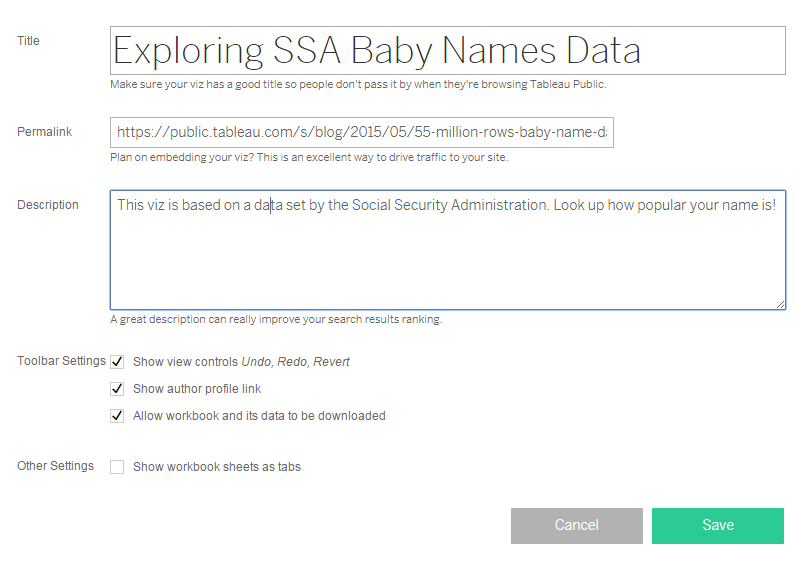
Editing viz details
Title: This defaults to whatever your workbook was named when you saved it, but you can change it into something more friendly.
- Permalink: By putting a link here, when people view your viz it will say “Published on” and link to your website. It will also open the viz as a lightbox over your website when shared.
- Description: Add a 150-character description to help people know what your viz is.
- Show view controls: This checkbox toggles whether your viz toolbar show Undo, Redo, and Revert
- Show author profile link: When this is checked, your viz will always show “more by this author” in the toolbar and link to your profile, even when the viz is embedded on another website.
- Allow workbook and its data to be downloaded: when this is checked, anyone can download your data. You can learn more about this feature in this blog post.
- Show workbook sheets as tabs: If you have multiple dashboards in your viz that you’d like the viewer to be able to flip through, you can check this box to display them as tabs. They’ll end up looking like this:
Show sheets as tabs enabled
We hope you get the most out of your Tableau Public profile! If you want to check out a couple really awesome author profiles, take a look at our author page.
관련 스토리

Iron Viz 2026: Read Between the Data
 2026/05/28

Tableau's Iron Viz Winners

Explore the 2026 Iron Viz Entries
 2025/12/15