Getting Started Guide
Dashboard and Viz Extensions API
Overview
The Tableau Extensions API allows developers to create dashboard and viz extensions for Tableau. Tableau extensions are web applications that can interact and communicate with Tableau and with applications outside of Tableau. A dashboard extension can be placed in the dashboard like any other dashboard object. A viz extension creates new viz types that Tableau users can access through the worksheet Marks card.
Start Here
Download or clone the Tableau Extensions API project on GitHub. For information, see Getting Started with Extensions. The project includes the Extensions API JavaScript library, documentation for creating and debugging your extensions, and provides sample code.
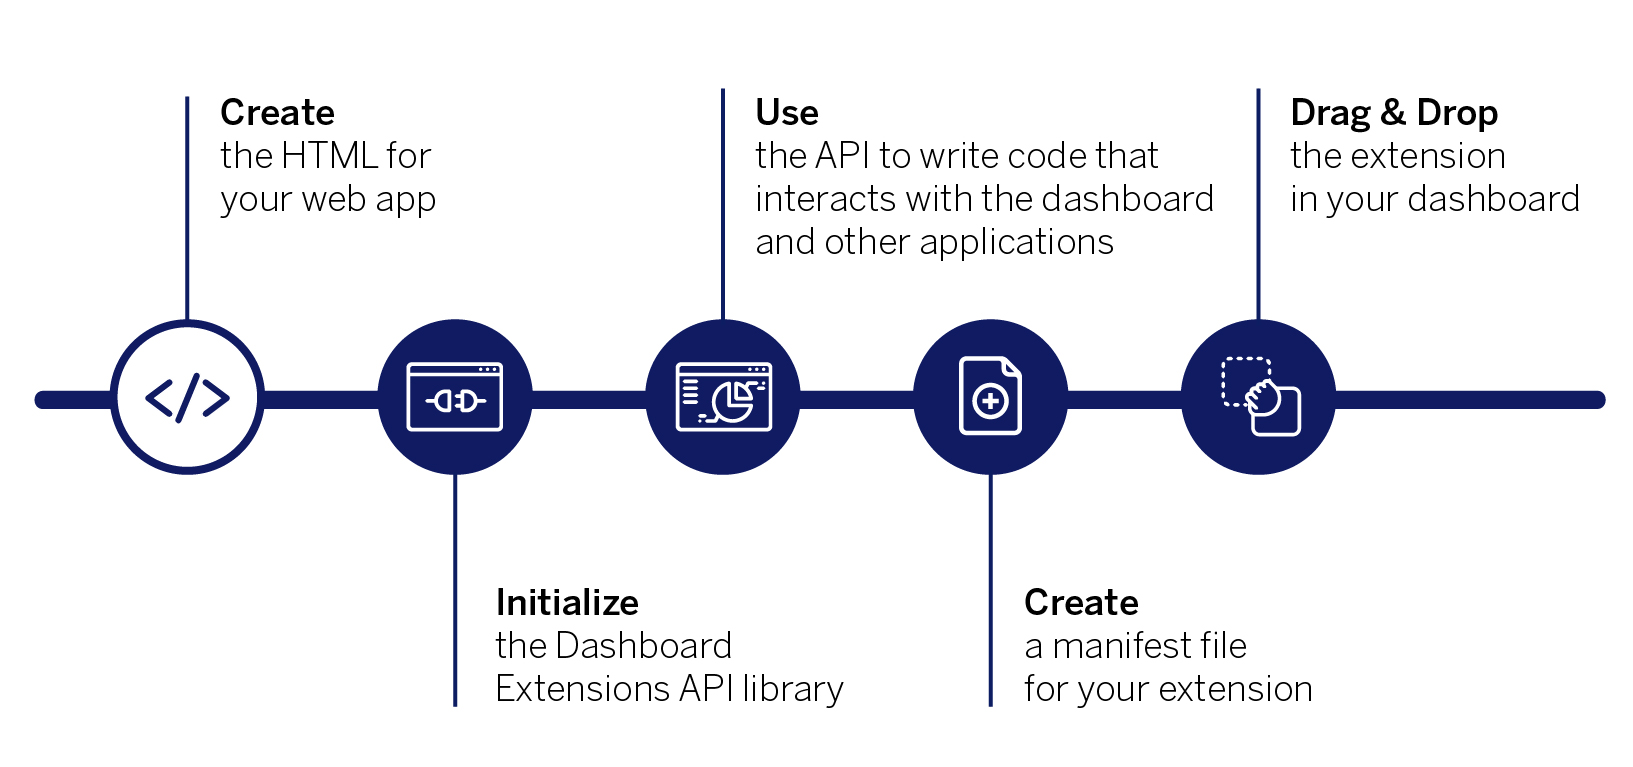
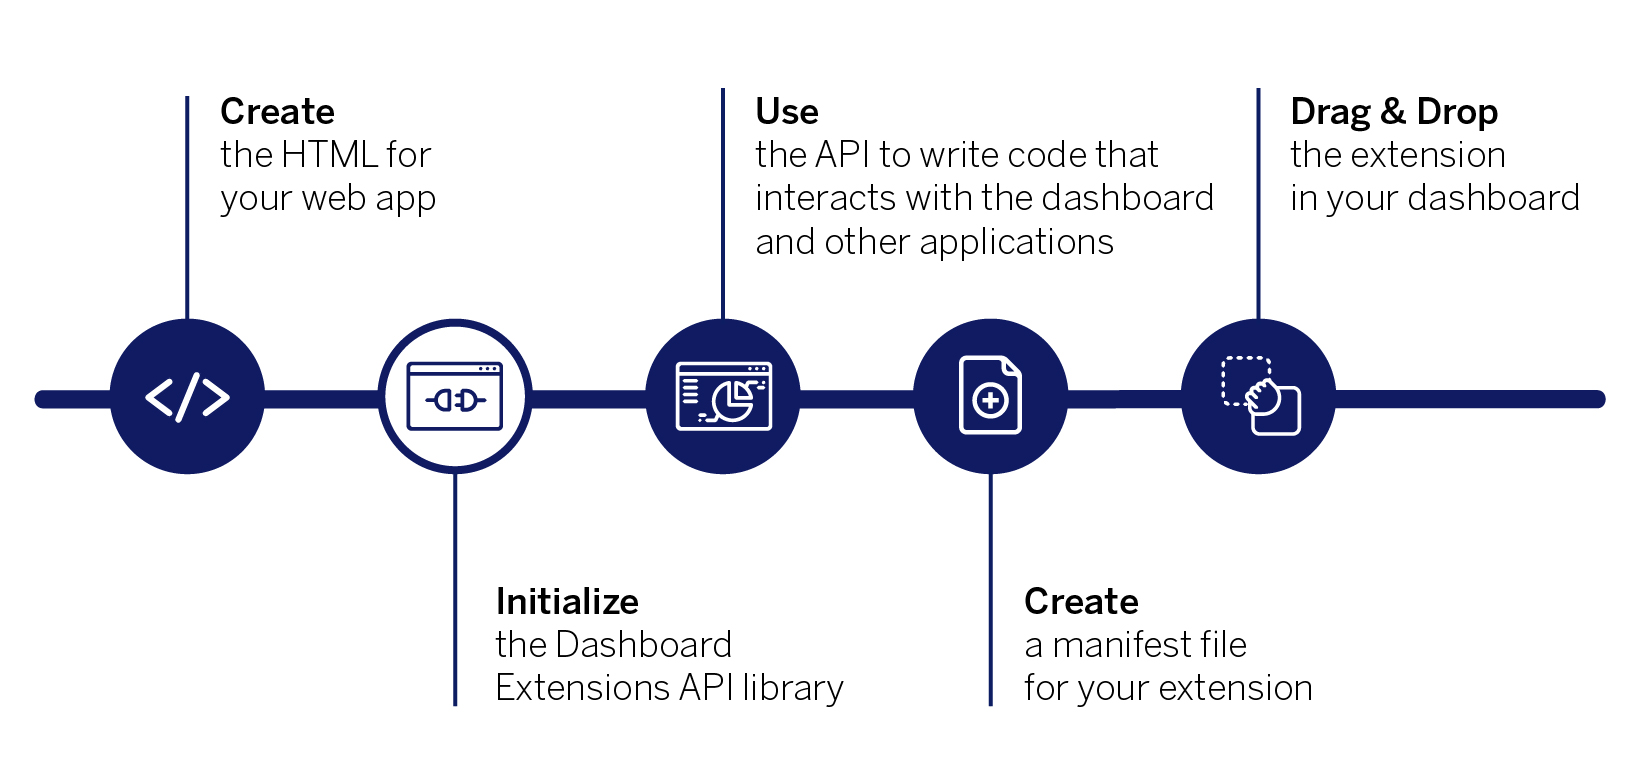
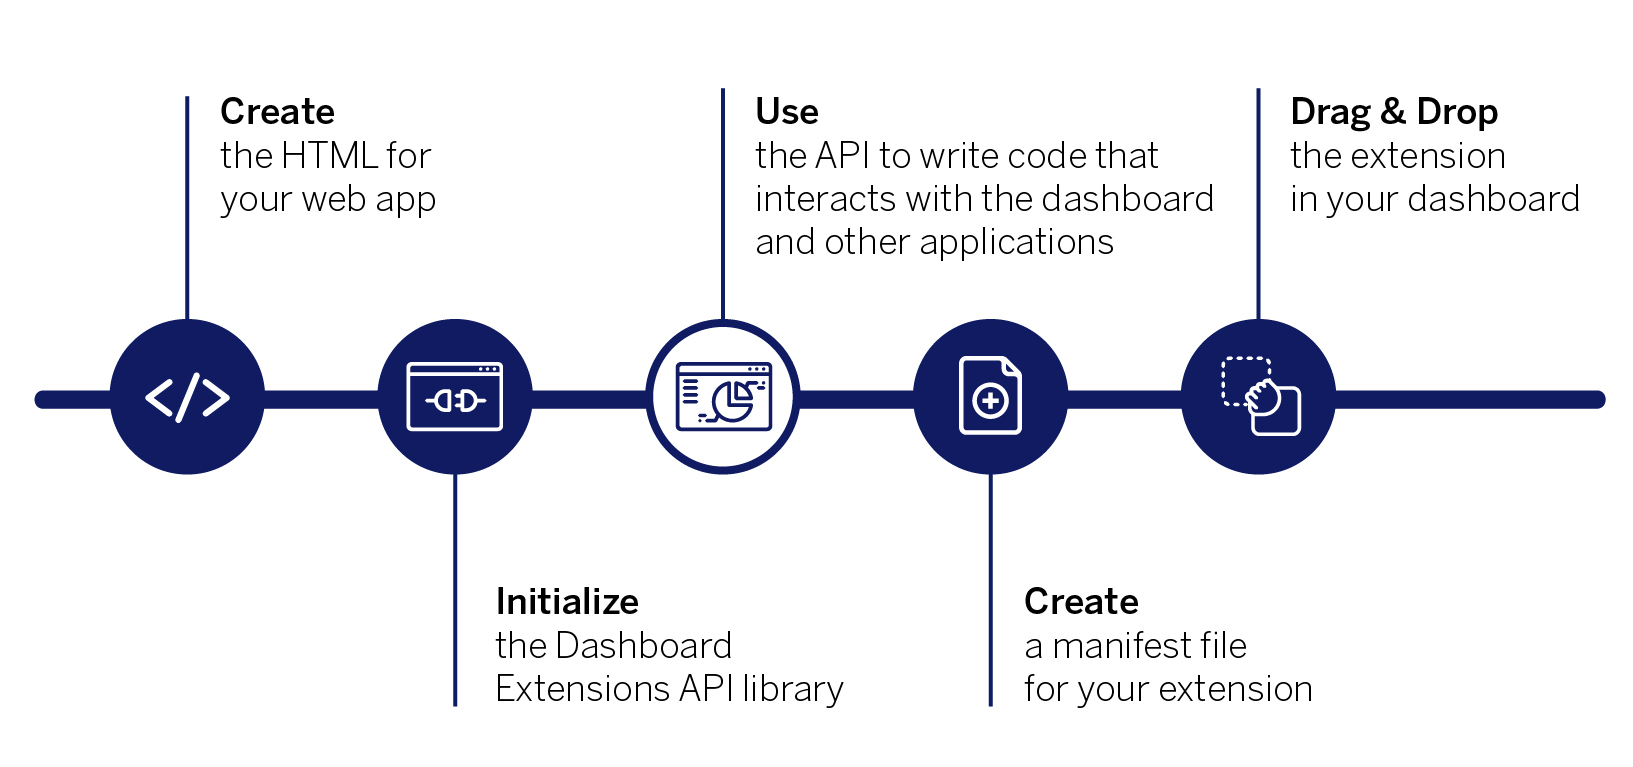
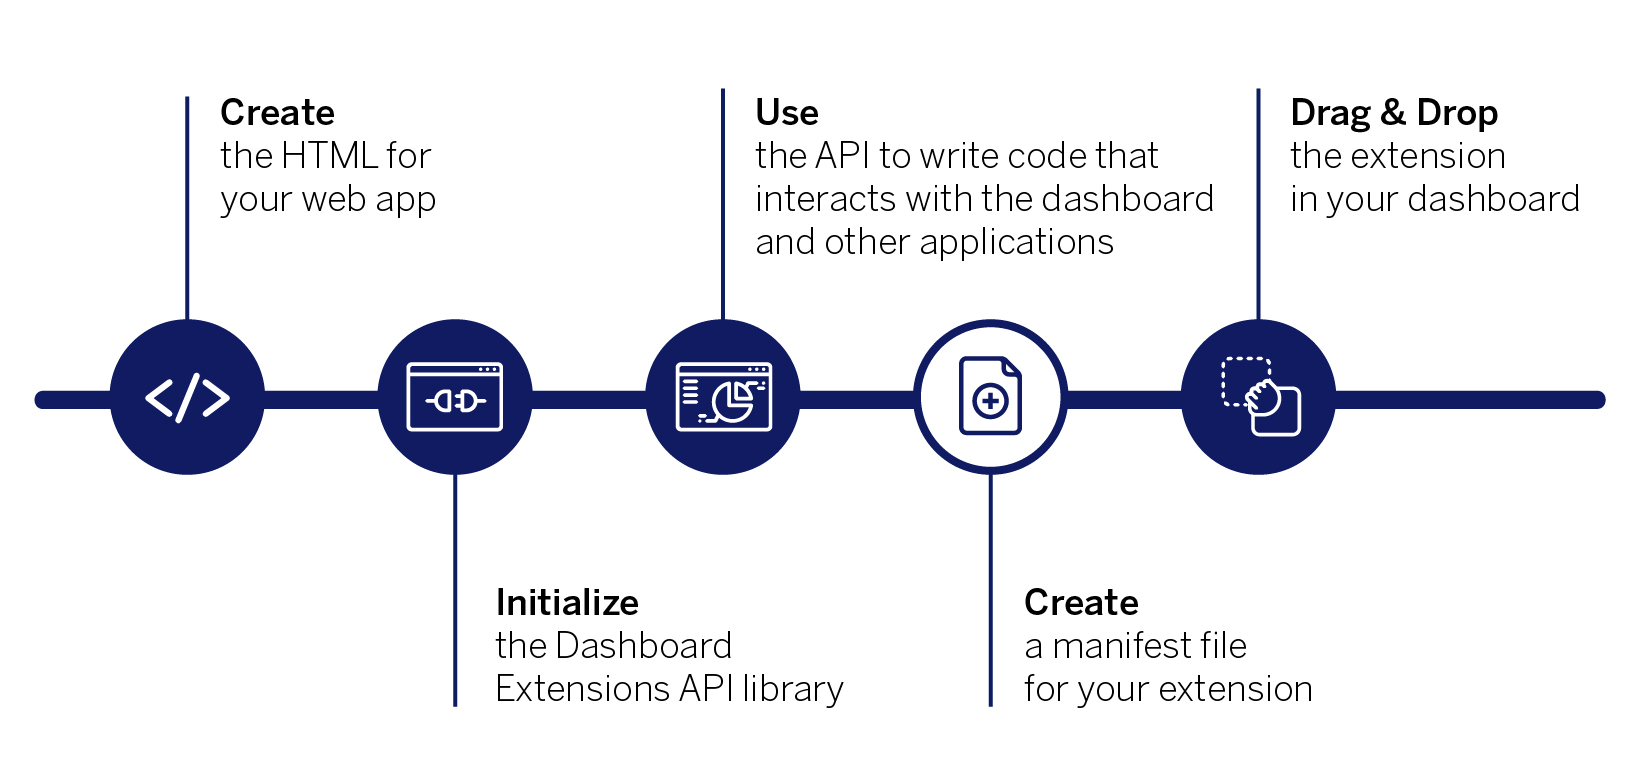
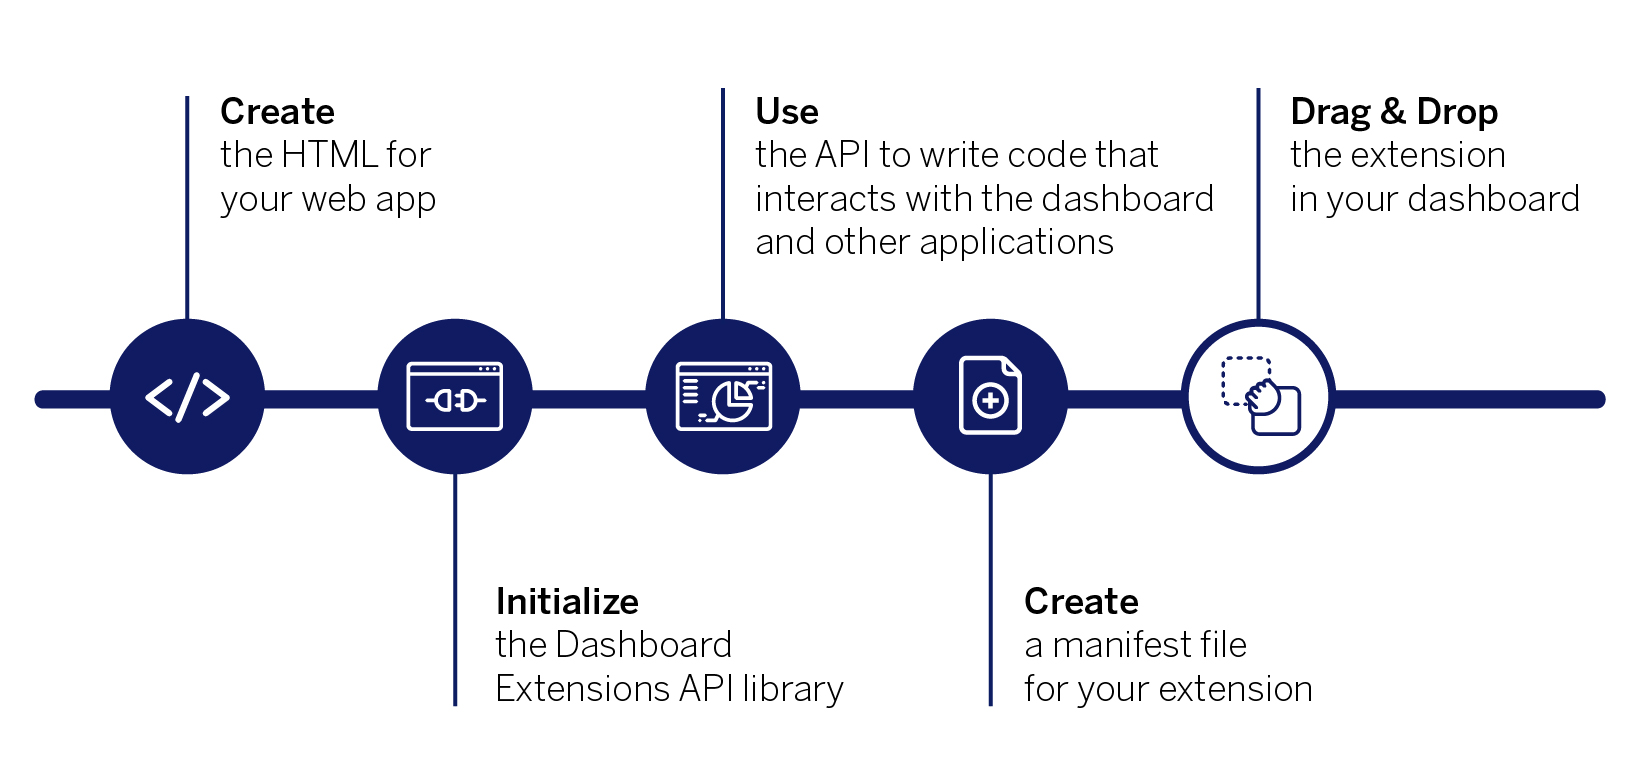
- Create your web app
- Initialize the Extensions API library
- Use the API to write code that interacts with the dashboard and other applications
- Create a manifest file for your extension
- Drag & Drop the extension in your dashboard
A dashboard extension is a web app that you create that controls and interacts with the Tableau dashboard objects. A viz extension is a web app that you create to make new viz types available to Tableau users. The web app consists of one or more HTML files (one is the minimum). You host this web app on a web server (the server specified in the manifest file, described in a later step).
Create the HTML page
Your web application must include an HTML page. This page should link to the Tableau Extensions API JavaScript library (tableau.extensions.1.latest.js) and to any other JavaScript, CSS, or HTML resources your web app requires. You could add the JavaScript code that uses the Dashboard Extensions API directly in the HTML page. However, in most cases you want to keep this code in a separate file.<!-- Path to Dashboard Extensions API Library --><script src="[PATH_TO_LIBRARY]/tableau.extensions.1.latest.js"></script><!-- Path to your JavaScript code that initializes the API --><script src="[PATH_TO_YOUR_JavaScript_FILE" ></script>
You’ll also need to choose a location to host your web page. This could be your on company’s web server, or as localhost on your own computer for testing purposes, or you can use some of the public sites available, such as GitHub or Heroku. For security, dashboard extensions require HTTPS, the exception to this is localhost where you can use HTTP for testing. See Suggestions for hosting your extension and HTTPS and Tableau extensions.
As an example of a dashboard extension, here's a simple HTML page that has a button. In the next step, we’ll hook that button up to a function that initializes the Extensions API.
·¬···¬······charset="utf-8"¬······http-equiv="X-UA-Compatible"·content="IE=edge"¬······name="viewport"·content="width=device-width,·initial-scale=1"¬¬·····<!--·Tableau·Extensions·API·Library··-->¬·····<!--·library·is·in·the·/lib·directory·-->¬······src="../../lib/tableau.extensions.1.latest.js"¬¬·····<!--·Your·JavaScript·code·that·uses·the·Extensions·API·goes·here·-->¬······src="./hello-extension.js"¬·····¬·····¬·······¬·········¬···········Hello·Extensions!¬············id="resultBox"·class="lead"Not·Initialized¬············id="initializeButton"·class="btn·btn-primary"Initialize·Extensions·API¬·········¬·····¬·
Pro tip!
When you design your web app for your dashboard extension, be sure to follow the Tableau Design Guidelines for Dashboard Extensions so that your extension adheres to the Tableau best practices and provides a seamless experience for your customers. Use the Tableau UI library, a React component library containing UI components that have the look and feel of Tableau.
After you create your HTML landing page and link to the Extensions API library, the next step is to add code to initialize the extension and call Tableau Dashboard Extensions API functions. In your JavaScript code (either in your HTML page or in a separate JavaScript file), you first need to initialize the extension. To do this, you call the tableau.extensions.initializeAsync() method. This asynchronous method returns after the initial bootstrap operation is complete and the extension is available for use. The Extensions API follows the CommonJS Promises/A standard for asynchronous method calls.
 tableau.extensions.initializeAsync().then(function() {
      // Initialization succeeded!
      //Add your JavaScript code here to call the Extensions API
  });
Once you’ve initialized the library, you can start to call the Dashboard Extensions API methods that access the elements and data in the dashboard. For example, you can listen for events on objects, such as worksheets, parameters, and settings. You can use event listeners to trigger specific actions based upon worksheet interactions, such as mark selection events. You can also call methods that get data from the worksheet or from selected marks, or that query the objects in the dashboard.
In this case, we are using the simple HTML page that was shown in the first step. Now we want to create a function that initializes the Dashboard Extensions API when someone clicks the button on the page. In this example, after initialization, we use the Dashboard Extensions API to get the dashboard object. With the dashboard object, you can do a lot of things, like accessing the worksheets and setting event listeners on filter change or mark selection events. In this case, all we want to do is get the name of the dashboard and then display that on our HTML page. In a JavaScript file, called Hello-extensions.js, we create a function called initialize().
 tableau.extensions.initializeAsync().then(function() {
      // Initialization succeeded!
      //Add your JavaScript code here to call the Extensions API
  });function initialize() {
    tableau.extensions.initializeAsync().then(function () {
     // Initialization succeeded! Get the dashboard
        var dashboard = tableau.extensions.dashboardContent.dashboard;
        document.getElementById("resultBox").innerHTML = "I'm running in a dashboard named <strong>" + dashboard.name + "</strong>";
     }, function (err) {
     // something went wrong in initialization
      document.getElementById("resultBox").innerHTML = "Error while Initializing: " + err.toString();
    });
}
The initialization function (tableau.extensions.initializeAsync) instantiates a dashboard extension. To handle the promise, the then method calls two callback functions to handle successful initialization or failure. In case of success, the example gets the dashboard object from the extension and then accesses the name property to display the name of the dashboard sheet in the hosting web page. In case of an error, the error message is displayed.
To make this all work, we need to call our initialize() function when someone clicks the button, so we need to modify our HTML code.
<div>
  <h1>Hello Extensions!</h1>
  <p id="resultBox" class="lead">Not Initialized</p>
  <button id="initializeButton" onclick=initialize() class="btn btn-primary">Initialize Extensions API</button>
</div>
For a complete list of all the methods and data structures, you can use, see the Dashboard Extensions API reference. For information about accessing data from Tableau, see Get Data from the Dashboard and Accessing Underlying Data.
For more ideas about what you can do with the Dashboard Extensions API, see the Dashboard Extensions Samples on GitHub and check out the Community Extensions. To see what Tableau Partners and others have created and to be able to download and try out those extensions, see the Dashboard Extensions Gallery.
Every dashboard extension needs to have a manifest file. The manifest file (EXTENSION-NAME.trex) is an XML file that describes the extension and provides information to register the extension with Tableau. The manifest file provides information about where the extension is hosted (the URL), what permissions are required (if any) to access data. The file also provides contact information, version information, and can specify an icon to use in the About box.
The following is an example of what a .trex file looks like. To create your own manifest file for your extension, you can copy from an existing one, or you can use the Tableau TREX Generator on Glitch. The Tableau TREX Generator is the easiest way to create the manifest file, you just fill in a form.
<?xml version="1.0" encoding="utf-8"?>
  <manifest manifest-version="0.1" xmlns="http://www.tableau.com/xml/extension_manifest">
    <dashboard-extension id="com.example.extensions.name" extension-version="0.1.0">
      <default-locale>en_US</default-locale>
      <name resource-id="name"/>
      <description>Extension Description</description>
      <author name="USERNAME" email="USER@example.com" organization="MyCo" website="https://www.example.com (https://www.example.com/)"/>
      <min-api-version>1.0</min-api-version>
      <source-location>
        <url>SERVER:PORT/PATH</url>
      </source-location>
      <icon>
      iVBORw0KGgoAAAANSUhEUgAAABAAAAAQCAYAAAAf8/9hAAAABHNCSVQICAgIfAhkiAAAAAlwSFlzAAALEwAACxMBAJqcGAAAAlhJREFUOI2Nkt9vy1EYh5/3bbsvRSySCZbIxI+ZCKsN2TKtSFyIrV2WuRCJuBiJWxfuxCVXbvwFgiEtposgLFJElnbU1SxIZIIRJDKTrdu+53Uhra4mce7Oe57Pcz7JOULFisViwZ+29LAzOSjQYDgz1ZcCvWuXV11MJpN+OS/lm6179teqH0yDqxPTCyKSA8DcDsyOmOprnCaeP7459pdgy969i0LTC3IO/RQMyoHcQN+3cnljW3dNIFC47qDaK3g7BwdTkwBaBELT4ZPOUVWgKl4ZBnjxJPUlMDnTDrp0pmr6RHFeEjjcUUXPDGeSEwDN0Xg8sivxMhJNjGzbHd8PkM3eHRfkrBM5NkcQaY2vUnTlrDIA0NoaX+KLXFFlowr14tvVpqb2MICzmQcKqxvbumv+NAhZGCCIPwEw6QWXKYRL/VUXO0+rAUJiPwAk5MIlgVfwPjjHLCL1APmHN94ZdqeYN+NW/mn6I4BvwQYchcLnwFhJMDiYmlRxAzjpKWZkYkUCcZ2I61wi37tLbYyjiN0fHk5Oz3nGSLSzBbNHCF35R7f6K1/hN9PRhek11FrymfQQQKB4+Gl05P2qNRtmETlXW7e+b2z01dfycGNbfFMAbqNyKp9Jp4rzOT8RYFs0njJkc2iqsCObvTsOsDWWqA5C1uFy+Uz/oXJeKwVT4h0RmPUXhi79vuC0Ku6yOffTK3g9lfxfDQAisY516sg5kfOCiJk7HoLt2cf9b/9LANAc7dznm98PagG1fUOZ9IP5uMB8Q4CPoyNvausapkTt3rNMuvdf3C/o6+czhtdwmwAAAABJRU5ErkJggg==
      </icon>
    </dashboard-extension>
    <resources>
      <resource id="name">
         <text locale="en_US">name in English</text>
         <text locale="fr_BE">name in French</text>
         <text locale="de_DE">name in German</text>
      </resource>
    </resources>
  </manifest>
For more information about what goes into the manifest file (.trex), see the Tableau Extension Manifest File.
After you have created the manifest file (.trex) and have hosted your web app you can test it in Tableau.
- Start up your web page or application (or make sure it is running).
- Start Tableau and open a workbook with a dashboard or create a new dashboard.
- In the dashboard, under Objects, select Extension and drag it onto the dashboard. In the Choose an Extension dialog box, click My Extensions and browse to the directory where you have your manifest file (
.trex).
After you select the manifest file, your web page should appear in the dashboard zone!
What’s Next
- For information about debugging your extension, see Debug Extensions in Tableau Desktop and Debug Extensions in Tableau Server and Tableau Cloud.
- You can also use the Tableau log files to identify issues, see Use Log files to Troubleshoot Dashboard Extensions.
- Security is a top concern. Tableau supports two types of dashboard and viz extensions. One is network-enabled, and has full access to resources and applications outside of Tableau. The other is a sandboxed extension, and is hosted by Tableau and employs W3C standards, such as Content Security Policy (CSP), to ensure the extension can’t make network calls outside of the hosting Tableau Server. For information about security and about creating a sandboxed extension, see HTTPS and Tableau Extensions, Cross-Site Scripting and Extension Security, and Create and Test Sandboxed Extensions.
Zuletzt aktualisiert am: 27 November, 2024