Subject Area: Architecture
Level of complexity: Advanced
Approximate Time to complete: 1-2 hours
Companion Workbook (twbx): n/a
Additional Resources on the web:
- http://onlinehelp.tableau.com/current/pro/online/en-us/customsql.html
- https://www.tableau.com/new-features/custom-sql-parameters-0
- http://kb.tableau.com/articles/knowledgebase/custom-sql-join
Tableau aims to make connecting to and working with your data easy. Tableau's patented VizQL engine acts behind the scenes to translate your actions in Tableau into efficient SQL queries, so unlike many other tools, working with Tableau doesn't require that you write complex SQL query before beginning your analysis. Instead, you are encouraged to connect to the tables containing all of the data you need via the Multiple Tables dialog, then using filters and calculations within Tableau Desktop.
When to use Custom SQL
With Custom SQL, Tableau will always use the provided query as the basis for all subsequent queries, as if the Custom SQL were a View in the database. Often this makes performance inferior to the queries produced automatically by VizQL against the basic Multiple Tables dialog (this will vary with the complexity of the query and the performance of the underlying database). However, there are cases where Custom SQL is necessary. Tableau's Multiple Tables dialog does not currently have a method to create Sub-Selects, UNIONs, or ON clauses for filtering rather than relationships. For any of those needs, Custom SQL is the right choice. If the Custom SQL is the basis for many different types of analysis, creating a view in the database is suggested, then connecting to it via the Single Tables option.
Two best practices are to A) avoid custom SQL if at all possible, as we will generate a double-query for each drag and drop (one inside the other, i.e. a nested select), and B) if you are going to use custom SQL, then you should also consider using our data extraction feature for performance reasons.
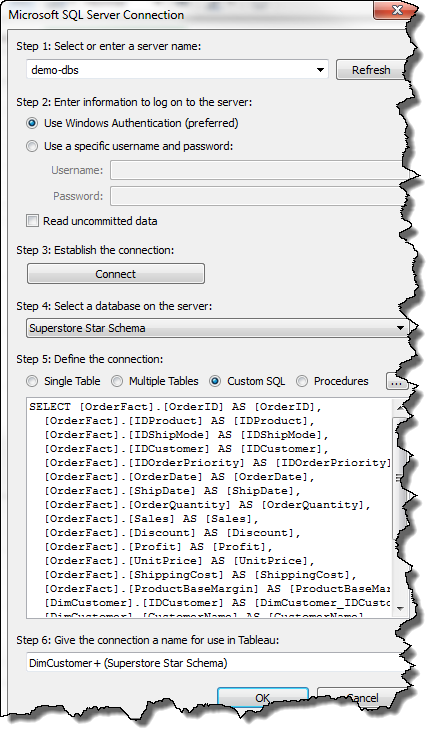
How to use Custom SQL
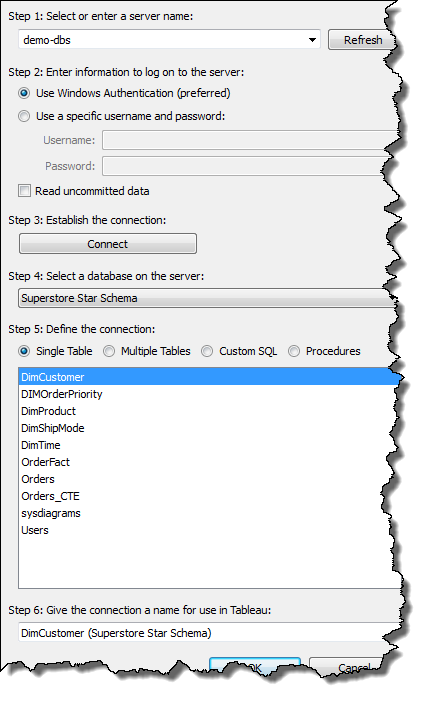
Tableau Desktop's connection dialog has three options: (1) Single Table (2) Multiple Tables (3) Custom SQL. These options actually form a workflow – you move from the Single Table selection box through to Multiple Tables before finally constructing your Custom SQL. Going through this workflow constructs SQL in the correct format for the underlying database and is advised whenever building Custom SQL for the first time for a given database. The table selected in the Single Table box is equivalent to the table in the FROM clause of an SQL query.
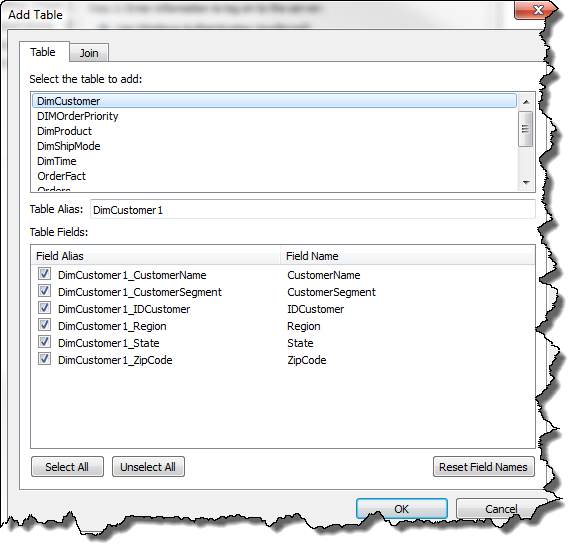
Once you've selected this table, if you need to JOIN additional tables, click the "Multiple Tables" selector. Press "Add Table.." below the table of Table names on the left. In the Add Table dialog that appears, choose the second table. This is equivalent to a JOIN in a SQL Query.
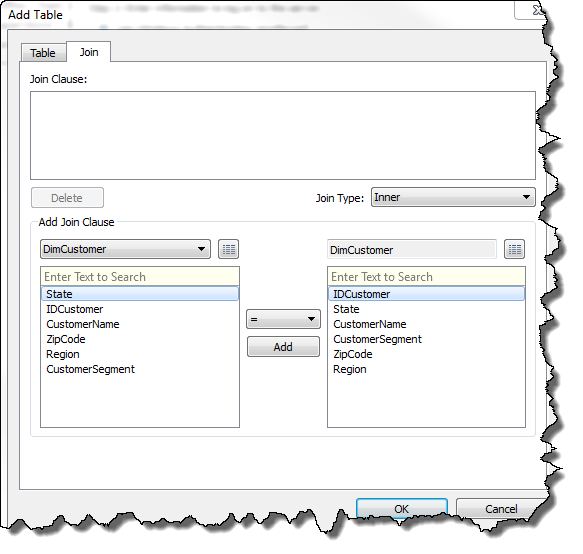
The "Join" tab allows you to define the keys and the Join Type (Inner, Left, Right, Full). It creates the ON portion of a JOIN clause. Tableau automatically recognizes some fields, so often the Join Clause box will have a relationship defined when you first click into the Join tab. You can remove the default join clause with the Delete button. The left box under "Add Join Clause" represents the table on the left side of JOIN clause. It will default to the primary table (the one you selected in the Single Table menu), but the drop down above the selector box allows you to change to one of the other tables you have added via the Multiple Tables menu. With the correct table selected, you then select the keys from each of the two tables, choose the operator (=, >, etc), then press the "Add" button.
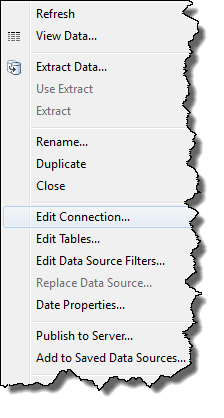
Once you've added all the tables you need, you should press "Ok" on the Connection dialog and Connect Live to the data. See if you can answer your question in Tableau using a combination of filters, aggregations and calculations. If you cannot, then it is time to go to the Custom SQL section of the Connection dialog. Right-click the data source and choose "Edit Connection"
Go to "Custom SQL". You'll see a big SQL query in a small box. This is a translation of all of the choices made in the Single Table and Multiple Tables dialogs into SQL. For easier viewing and editing, click the "[…]" button above the query to the right and an edit dialog will appear.