Tableau Online tips: Manage and configure your site with ease
When moving to the cloud, server admins often worry about losing control. We’re here to tell you that’s not so.


Editor’s Note: Tableau Online is now Tableau Cloud.
 This post is part of our series covering tips, tricks, and ideas in Tableau Online, our cloud collaboration and sharing platform.
When moving to the cloud, server admins often worry about losing control. They worry they won’t be able to manage and configure their environment. We’re here to tell you that’s not so. Tableau Online handles the behind-the-scenes work so admins can focus on what matters most: getting your data in front of the right people. With Tableau Online, you’ll never have to worry about:
- Server hardware - Say goodbye to processor speeds, hard drive failures, and core counts
- Hardware configuration - Never worry about your backgrounders again
- Network configuration - Ports? Who needs them!
- Upgrades - No more scheduling downtime for Tableau Server upgrades! We handle it all
But that doesn’t mean you won’t be able to configure your Tableau Online environment as an admin. In fact, you’ll have many vital capabilities such as:
- Custom logos
- Embedded views - Embed using HTML or our JavaScript API
- Integrated authentication - Leverage SAML to integrate with your existing Active Directory
- Developer tools - Extend and automate Tableau Online functions
- Administrative views - See site and server activity
- Content organization - Use multiple sites and projects to give your users designated spaces
- Permission management - Choose how and what people can see and share
How to set up permissions for groups and individuals
To show you how easy it is to govern your analytics, let’s walk through an example.
Say you want to create a place for people in various departments (sales, human resources, and IT) to view and share analytics. And each department needs to have different levels of access to the underlying data.
You can easily create this environment in Tableau Online using groups.
First, sign in to Tableau Online, then navigate to “groups.”
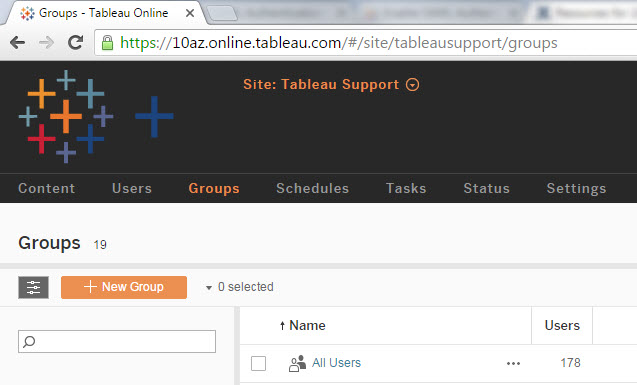
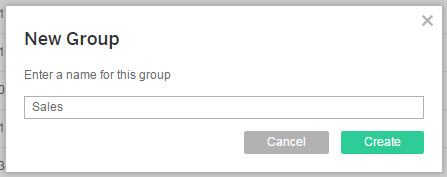
Click “new group” and enter a name for the group. In this case, you’ll need groups for sales, human resources, and IT.
Now you can easily manage individual users.

Add users by clicking on the group name. Select “add users,” and search for the people you want to add. Users can be a part of multiple groups.

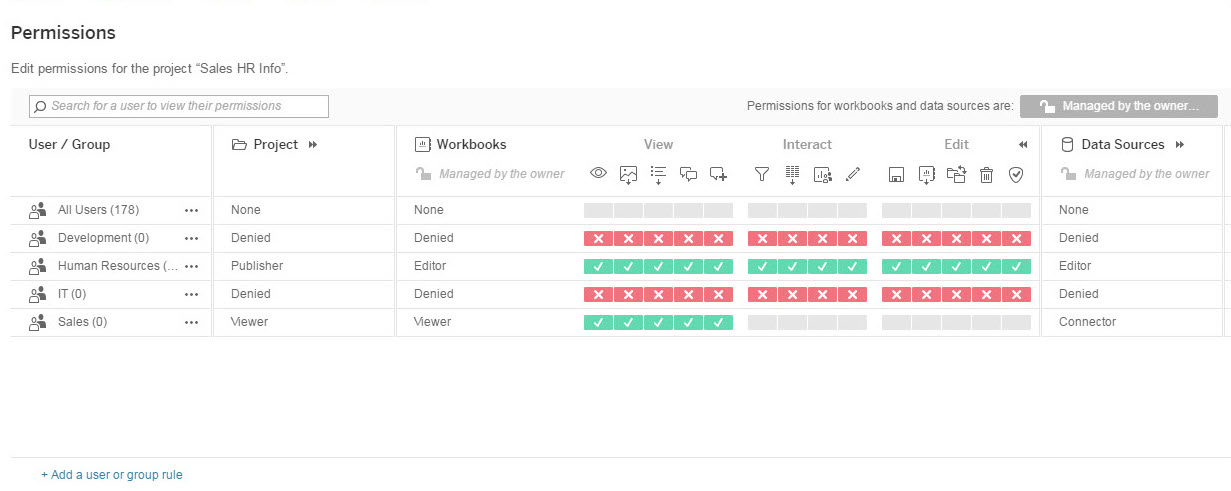
Let’s say you are an administrator and have created a project called “Sales HR Info.”

You want human resources to be able to add, edit, and view the project. And you want sales to only be able to see the project. But you don’t want IT to be able to interact with the project at all as it doesn’t pertain to them.
Hover over the project, click the top-right corner of the box, then select “permissions.”

Next, select “add a user or group rule.” Search for and add “human resources.” Then give the group publisher privilege for the project and editor permission for workbooks and data sources.
Follow the same process to add in your remaining groups. You can even verify the permissions by clicking the arrows next to each section.

Now you can rest easy, knowing your permissions will safely govern how people interact with analytics on this site.
How to set up permissions for Tableau Desktop
But what if you don’t want to go into Tableau Online every time you need to set permissions for a workbook or data source? Well, you can set permissions right from Tableau Desktop!
Maybe you want to publish human-resources data to your project in Tableau Online, but you don’t want your sales teams to have access to the data as it contains private employee information.
From Tableau Desktop, select "Server" on the toolbar, then “publish.”

After signing in to Tableau Online, you can select your project, name, description, tags, and permissions for the data source. You can also choose to have the permissions mirror those you’ve already created in the project. In this case, you’ll want to make sure users in the “sales” group can’t connect to the data.
Select “edit” next to permissions, choose “sales,” click “edit,” and change “connect” to “deny.” Now your permissions are set correctly and you can publish the data source. (Note: Selecting “unspecified” will use the permissions set for the overall project.)
But wait, there’s more!
We’ve just looked at two simple ways to govern analytics and data for multiple users across multiple projects.
Still, there is more to learn. For advanced admins, the REST API can be used to automate many of the features we discussed such as adding projects, creating groups, and editing permissions. Learn more in our Online Help guide.
Still not sure if moving to the cloud is the right next step? Start a trial and find out!
Autres sujets pertinents

The Tableau+ Bundle with Premium AI, Enterprise Capabilities, and Premier Success
 24 juin, 2026

What is Tableau Cloud Manager?
 17 juin, 2026

Insights Wherever You Work: Meet the Tableau App for Microsoft 365
 16 mars, 2026