How to secure your data across Tableau with data policies for row-level security


In my previous blog post, I discussed a new content type introduced in Tableau Data Management with our 2021.4 release: virtual connections. In addition to the sharing and management benefits, virtual connections now provide a centralized point of access to your data through which all queries flow–which makes them the perfect place to enforce your data security rules. Data Policies for Row-Level Security, a feature also added in 2021.4, lets you control who can see what data anywhere in Tableau.
Row-level security (RLS) in Tableau refers to restricting the rows of data a certain user can see in a given workbook or data source at the time they view the data. This allows you to better control what data users see in a published view based on their Tableau login account.
How are data policies different from other types of row-level security?
As enterprises expand their use of Tableau, data security techniques using data source filters and user calcs become harder to maintain and scale. Rather than implementing row-level security individually on every Tableau workbook or data source accessing a sensitive table (which could be hundreds or thousands of different items), data policies and virtual connections let you achieve that same level of security by defining a policy just once. That policy will apply to all workbooks, dashboards, and data sources that use the virtual connection, so the data will always be secure whenever it is used.
Data policies work equally well with live and extract-based data. Other types of data security, like in-database RLS, must be used live because the user needs to authenticate to the database itself for every query. With data policies, you can have the performance benefits of extracts and the security benefits of RLS.
In a complex organization, the creator of a data source may not be the expert on data security policies. In fact, that expertise may be shared by many people. With virtual connections as a separate content type, data owners control data security so Creators who aren’t security experts are freed from that responsibility.
Secure your tables with data policies
Employing a data policy to secure your data is simple:
- Start by creating a virtual connection with the tables you want to secure.
- Create a new data policy in the virtual connection.
- Choose the table(s) that should be secured by this policy.
- Choose the fields from the table(s) that you want to use in the policy.
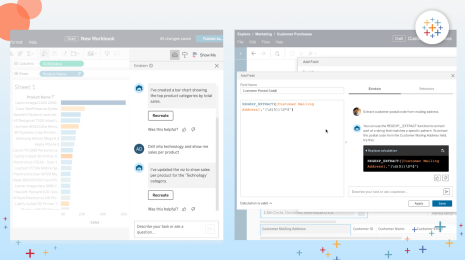
- Type a policy condition that returns a boolean using the Tableau calc language.
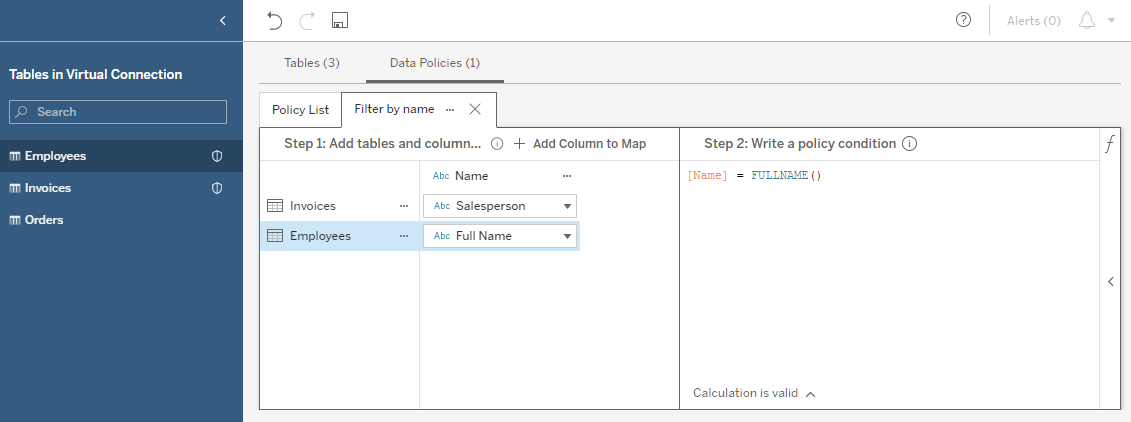
That’s all there is to it—when anyone queries that table, the policy condition will be evaluated for each row. If it evaluates to TRUE, the row will be returned. If it evaluates to FALSE, the row will be hidden from the current user. For example, if the policy statement is [Salesperson] = FULLNAME() , then I would only ever see the rows where “Sanjeev Verma” appears in the Salesperson field. I can never see the details of anyone else’s sales.
You may have noticed the list of tables and columns on the left. This is a map from table column names (in the source tables themselves) to a policy column name (that appears in the policy statement). You can use this map to apply the same policy to multiple tables, even if they don’t have the same schema. This is done by mapping the table column names you want to reference to a single policy column name, then using that name in the policy.
You can make policies as complex as you need by combining multiple statements using boolean logic. Here are a few examples of common policies:
|
Policy statement |
Effect |
| [Name] = USERNAME() OR ISMEMBEROF("Admins") | Anyone can see rows with their name, and members of the group Admins can see all rows. |
| ISMEMBEROF("Puget Sound Employees") AND [City] = "Seattle" | All Puget Sound employees can see data for Seattle. All other rows are hidden from everyone. |
| FULLNAME() != "sverma" |
Everyone except me can see every row, but I’m not allowed to see anything. :( |
Validate that your policy is correct
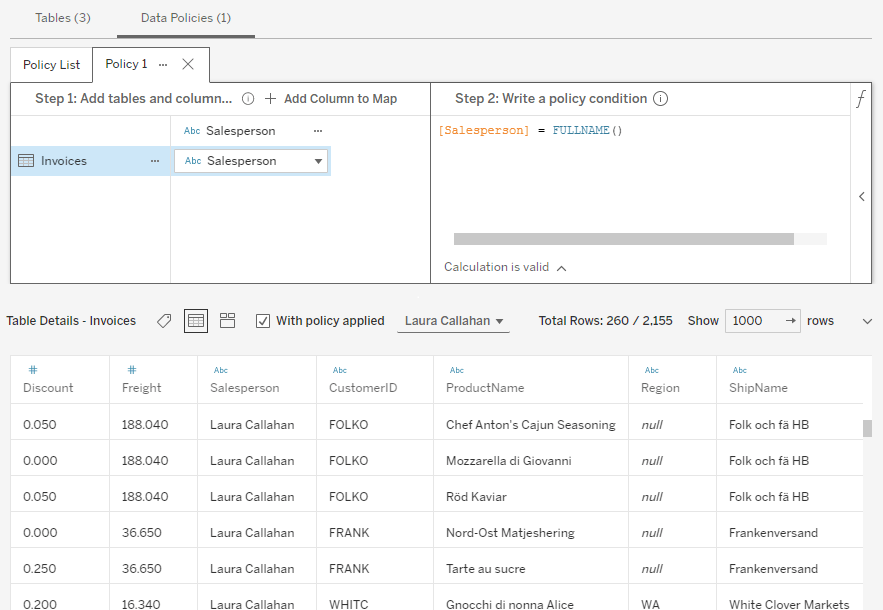
Once you’ve created your policy, you can preview the results of a query as any user on the site. This helps you ensure that the policy is working as you expect, which can be difficult with a complex, multi-part policy statement.
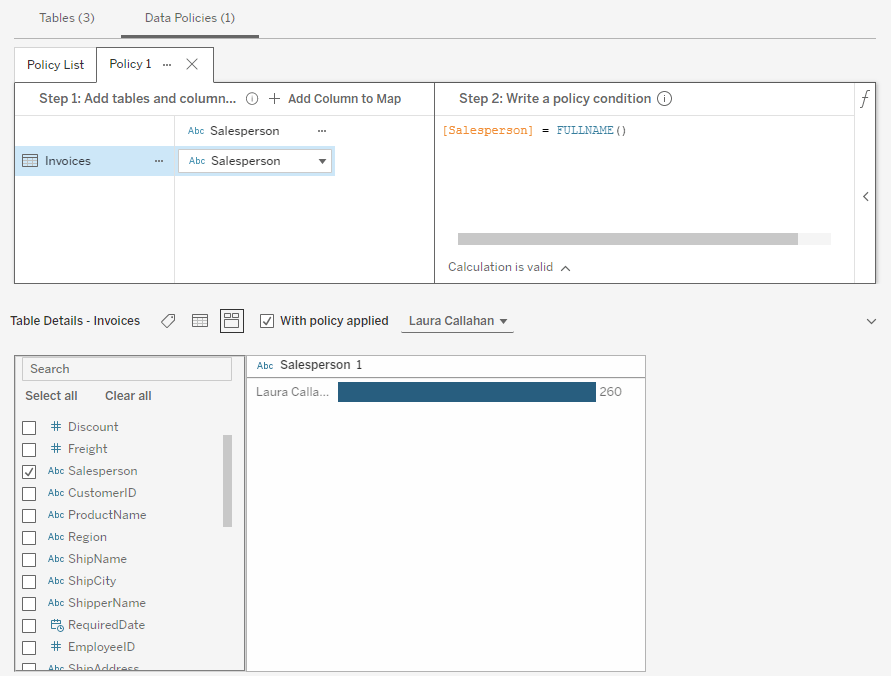
If you can’t easily validate your policy by looking at the raw data—perhaps the table is very large—you can use the histogram preview to see exactly which values are present in the entire data set. For example, in this screenshot I can confirm that the only salesperson is Laura Callahan.
Please note: This previewing method is only available within the virtual connection editor, and you must enter valid credentials to the underlying database before you can get to it. This restriction maintains security since the only people who can preview someone else’s view of the data have proven that they already have access to the entire set of data anyway.
Expand your ability to filter with entitlement tables
Sometimes, the data you’re trying to secure may not have a field that you can filter on using Tableau’s built-in user functions. The data policy editor lets you add a separate table, known as an entitlement table, to map from a field in your table to one you can filter on. For example, you could map from a numerical employee ID number to the employee’s username, or map from a sales region to the people who are allowed to see the data from that region.
To do this, first add the table you want to secure to a policy, as above. Then add another table from the virtual connection as an entitlement by dragging it into the policy map or clicking on the arrow next to the table name. Finally, choose which field(s) relate the two tables to each other. Now you can use any field in the entitlement table in your policy statement.
Please note: You may wish to change the visibility of your entitlement table in the Tables tab so it’s not available to consumers of your virtual connection. It will still work in your policies, even if it’s hidden.
Learn more about data policies in Tableau
Want to learn more?
- Read up about data policies for row-level security in Tableau Help.
- Learn other RLS techniques and when to use each.
- Explore what else we released in Tableau 2021.4.
- Don’t forget to upgrade to Tableau 2021.4 today!
Relaterade berättelser
Who is Einstein Copilot for Tableau for?
 10 April, 2024

Securely Access and Analyze All of Your Data with Data Connect for Tableau Cloud

Tableau Prep Conductor Supports Custom Schedules
 15 Mars, 2024
Subscribe to our blog
Få de senaste Tableau-uppdateringarna i din inbox.