Creating Custom Slide Presentations with Tableau


A few years ago, I had the opportunity to present some of my data visualization work at the inaugural Tapestry Conference in Nashville, Tennessee. I wanted to create a custom interactive presentation that let users navigate back and forth between a number of different tabs in my workbook. I could have just used PowerPoint, but then I couldn't add interactive data graphics to each "slide" if I wanted to. And Tufte would have killed a kitten, or something. This was prior to the release of Story Points, so I had to create the navigation controls from scratch by using Dashboard Actions in a creative way. This technique is still useful if the standard Story Points layout or navigator boxes don't afford you enough design freedoms.
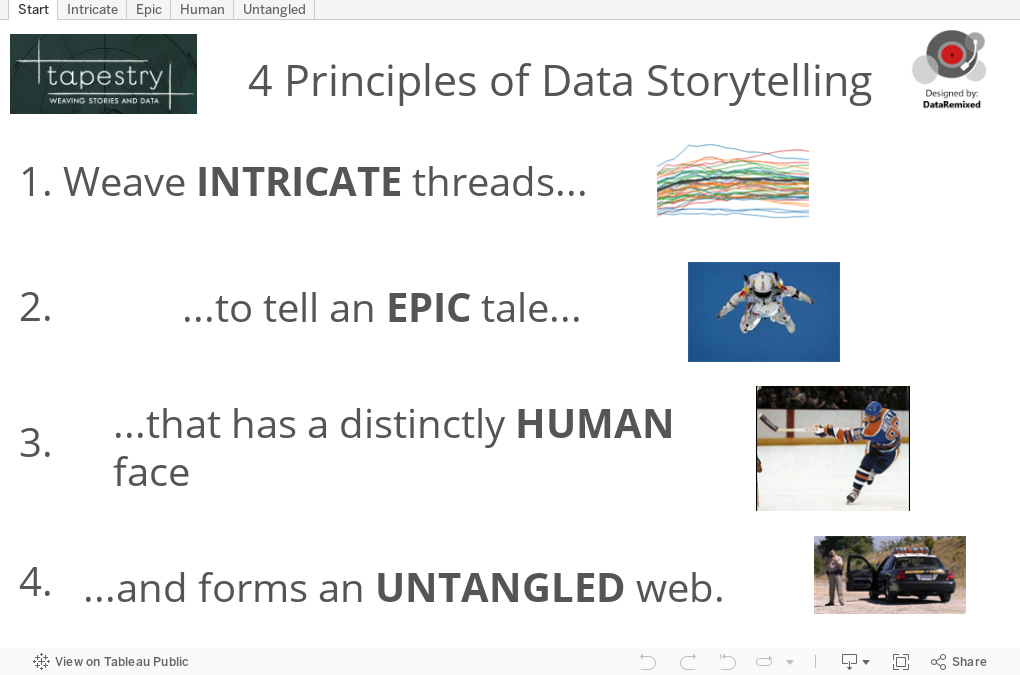
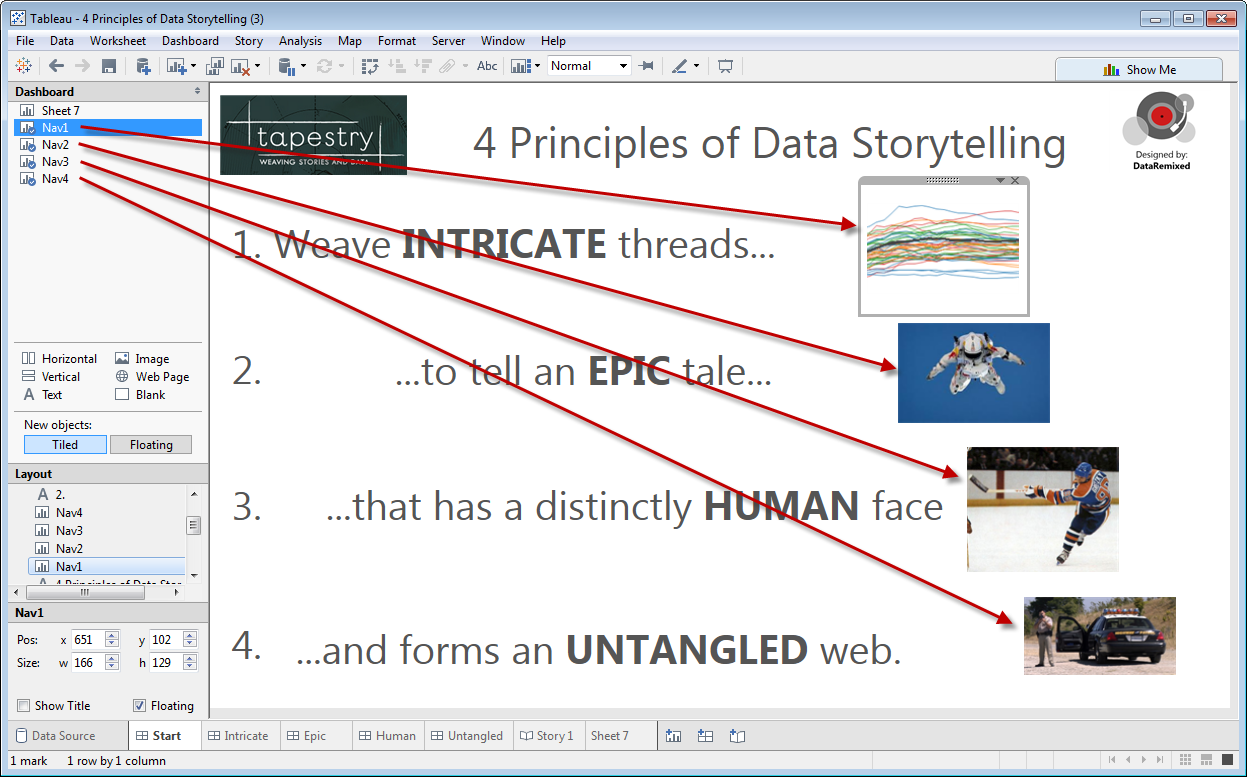
Let me first show you the presentation I created, and then I'll show you how I created it. On the first slide, you can click on the images to navigate to each of the four points. On the four slides that make up the body of the presentation, you can click the left or right arrows to move forward or backward through the tabs:
How to Create a Slide Deck in Tableau
Creating the Nav images
The Nav images on the first slide are actually individual Sheets in the Tableau workbook with a custom shape for each image. To create these images so that they can control the navigation in Tableau, I first took screenshots of each of the four images that I wanted to use for my navigation tiles on the front slide, and then I uploaded them to a new folder in \Documents\My Tableau Repository\Shapes:
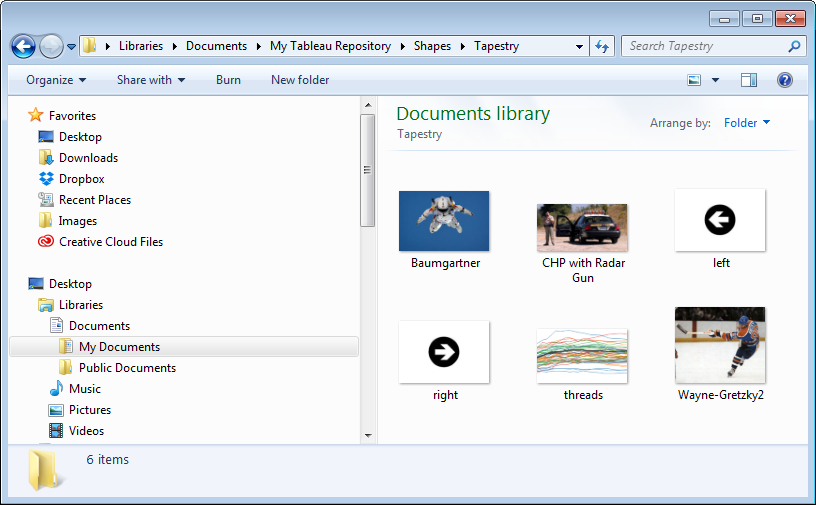
Adding images to the Shapes folder My Tableau Repository
I then created a simple spreadsheet in Excel that contained a single column with each of the slide titles, and including a header row at the top called "Page".
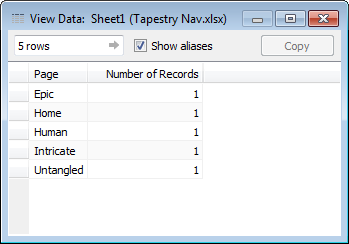
A simple spreadsheet that contains a list of slide titles
Then, I created a new Tableau workbook, connected to my simple slide-title list, and created four new Sheets called Nav1, Nav2, Nav3, and Nav4 (you can name them whatever you want). Each of these Nav sheets is created by putting Page on Rows, filtering to the Page name, changing the Marks type to Shape, dragging Page onto Shape, and then editing the shape to map to the corresponding image in the new folder I created in my custom shapes repository:
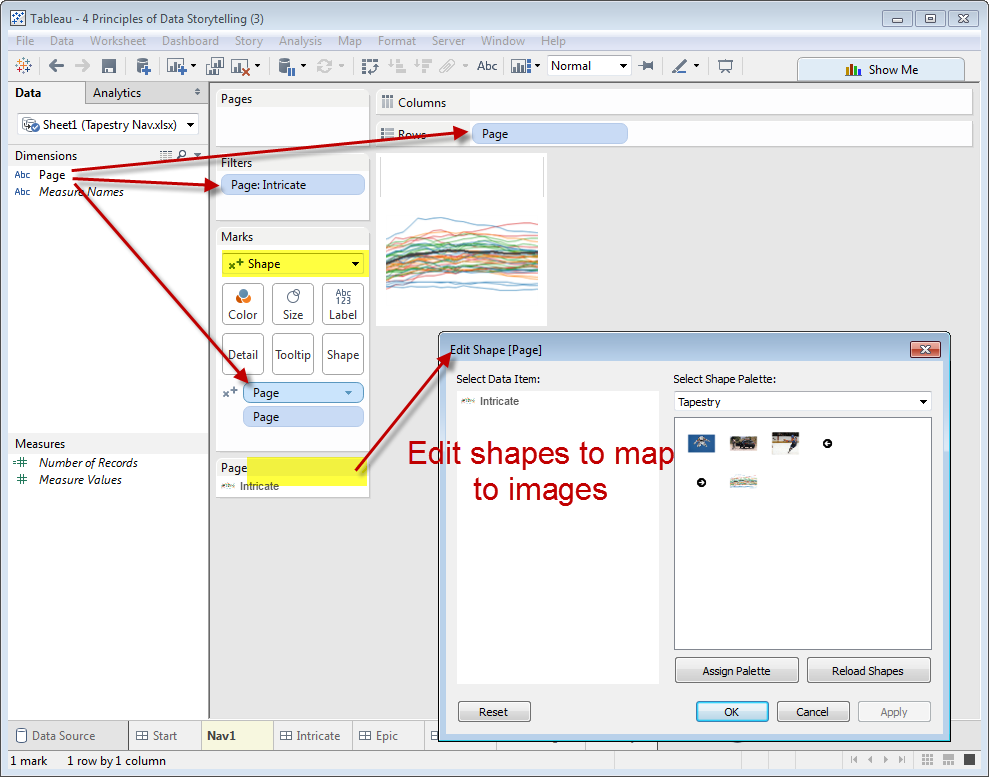
Creating Sheets with custom images that act as slide navigation controls
Creating the First Slide Dashboard
Once I had made all of the Nav Sheets for the first slide, I created a new Dashboard and arranged the Nav Sheets how I wanted them in the view and added text and images to complete the slide. Here's what it looked like before adding any Actions:
Arranging the Navigation Sheets onto a single Dashboard that serves as the first slide
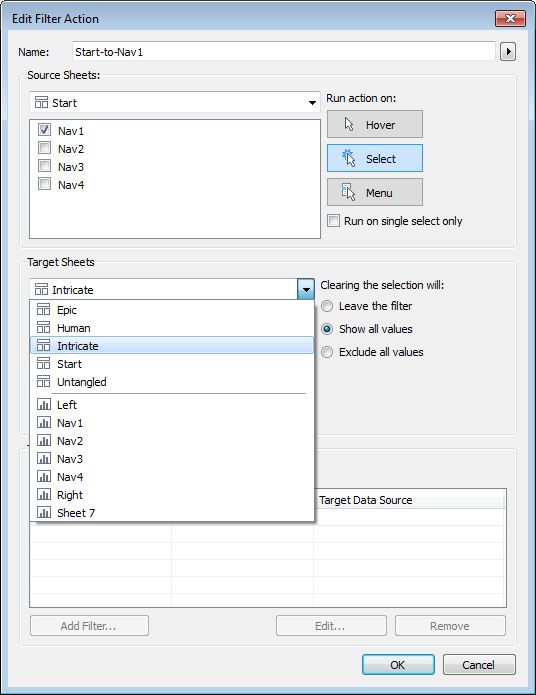
Next, in preparation to add the navigation controls I created four new (blank) Dashboards and renamed them to match the titles of the four body slides in my presentation. Then, I created four Dashboard Actions (Dashboard > Action > Add Action > Filter) that created the navigation controls. Here is the filter that takes the reader from the Start slide to the first body slide (entitled "Intricate") when they click on the Sheet called Nav1 - notice how the Target Sheets drop-down selector is set to "Intricate", which is the title of the first slide:
Creating a Dashboard Filter Action that allows readers to click on a Sheet on the first slide and be taken to another slide
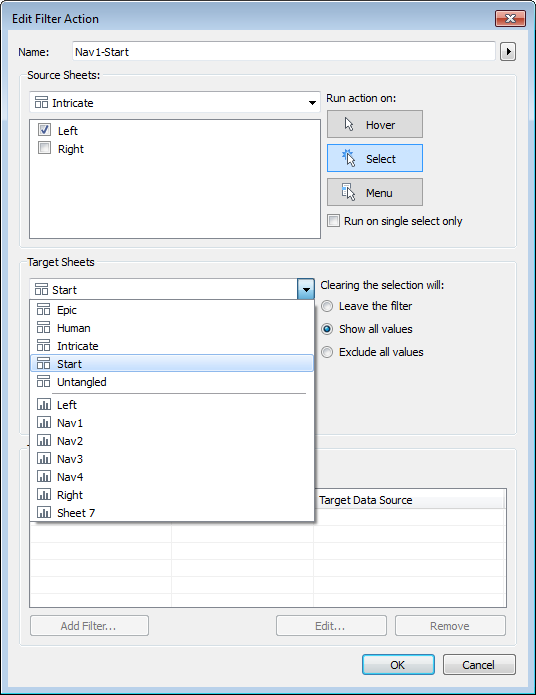
I repeated the above process to create the left and right navigation arrows on the body slides, using a different simple table, custom shapes, and two Sheets ("Left" and "Right") with the arrows as custom shapes. The key difference is that each of the 4 body slides needed their own Dashboard Actions (filters), because "Left" on the second slide takes you to a different tab than "Left" on the third slide. Here's an example of what the filter that controls the "Left" arrow on the second slide looks like:
Adding images to the Shapes folder My Tableau Repository
Saving Sheets as Tabs
When I had designed each of the four body slides and added their corresponding Left and Right navigation filters, I saved to Public, making sure to Edit Details of the workbook in the browser after saving and checking the "Show workbook sheets as tabs" box:
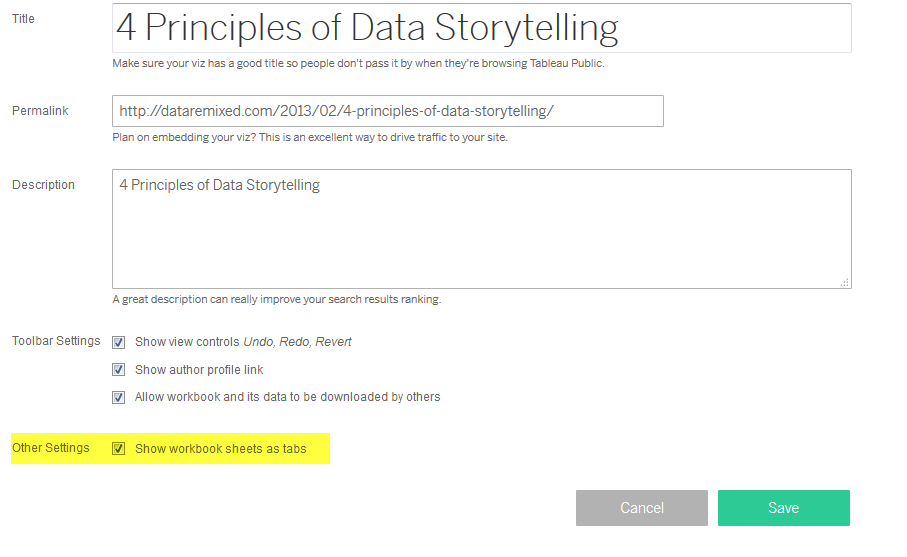
Editing a Workbook to "Show Sheets as Tabs"
Storie correlate

Meet Iron Viz 2024 Finalist Jessica Moon
 15 Aprile, 2024

Meet Iron Viz 2024 Finalist Pata Gogová
8 Aprile, 2024

Student to BI Analyst, How Tableau Can Lead to a Successful Data Career
 20 Marzo, 2024
Subscribe to our blog
Ricevi via e-mail gli aggiornamenti di Tableau.