FIRST Robotics: Advanced Pit Scouting Using Access
For the raw data used to complete these examples, please download the PDF version of this tutorial. Data is located in the Appendix.
View as PDF
Design View
To use the advanced features in Access, you must first switch to design view.- On the lower right hand corner of our table, there are four buttons. Click the far right icon.

- Now your table should look like this:
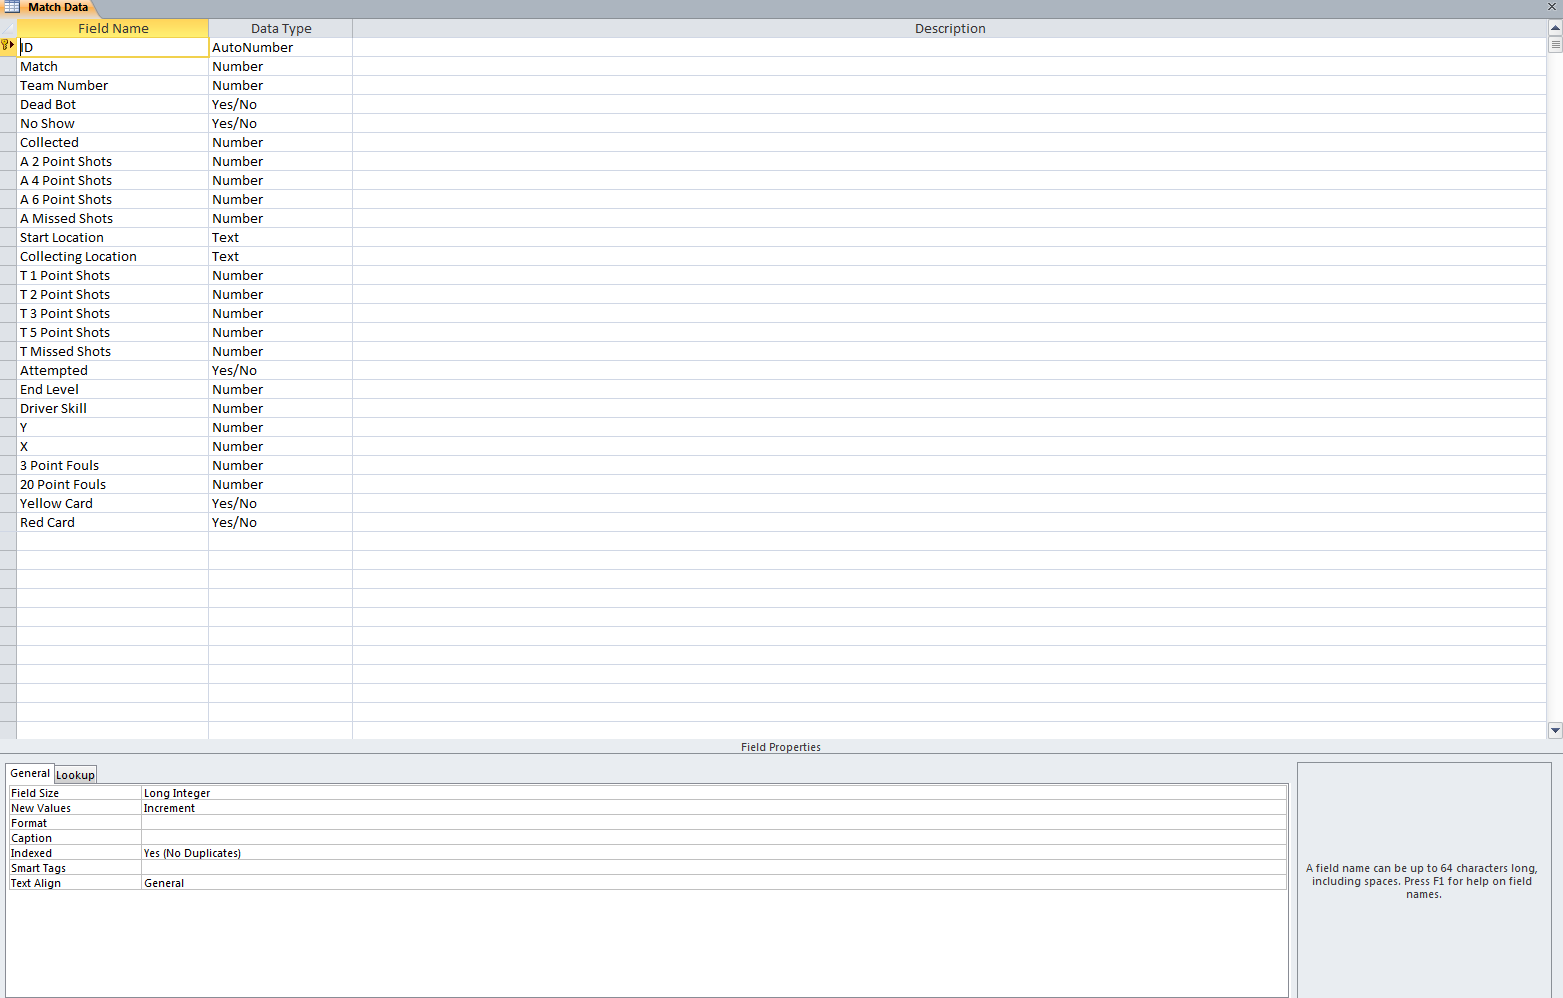

Using Combo Boxes for Error Checking and Auto Complete
You can have more control of what can and can't be entered into a box by changing the display control for fields to Combo Boxes.- Click on the starting position field.
- Select the Lookup tab in the Field Properties box.
- Change the Display Control field to Combo Box.
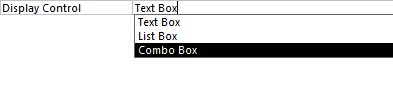
- There are several different options for Row Source Type.
- Table/Query - Creates a list of values from a specified table. This is useful when there are many options or if options change frequently.
- Value List - Creates a fixed list of values through manual input. This is optimal for small, static lists (e.g. Pit Scouting or Starting Location).
- Field List - Field lists are much like Table/Query, but a field list uses field names from a selected table rather than the actual values.

- For this case, use Value List since starting location options are fixed and limited.
- Next, type all possible starting location options in the Row Source field.

- By doing this, scout input will autocomplete to the next word.
- The next step involves error checking. Consider these two options:
- Limit to List - If changed to yes, user input is limited to values contained in that list. Entering a value other than those in the list will result in an error prompting the user to change their entry.
- Allow Value List Edits - If changed to Yes, scouts will be able to edit the list of allowable options. If no is selected, scouts will not be able to change the list without editing the field on the back end.


Combo Boxes 2
Now that you've used a Value List, try using the Table/Query Row Source option to make a combo box for Team Number.- First, create a new table and input all of the teams present at this regional.
- Download the pdf of this tutorial for an Appendix containing the list of teams.
- Return to design view of match data to turn the Team Number field into a combo box.
- Set the Row Source Type to Table/Query
- Select the table where team numbers are located from the Row Source drop-down list.
- Now, a team number combo box will be populated by the contents of that table. For this type of combination box, it's recommended to turn on 'Limit to List' while keeping 'Allow Value List Edits' off.


Other Data Checking Tips
Here are a few other formatting options to improve your data.Required Fields
- By checking the box marked 'Required' in the Field Validation section of the Fields tab, Access will prevent record entry when these required fields are left blank. To minimize error messages during data entry, limit using this required field setting to only the most important fields (e.g. Match and Team Number).

Field Validation Rules
- To set a field validation, select "Record Validation Rule" from the Validation drop-down menu in the Fields tab.
- This will open the Expression Builder window.
- In the Expression field, enter a logic test for impossible values.
- For instance, in this example, teams were only allowed 4 Frisbees at the start. By creating this validation rule, any entry showing more Frisbees than the starting amount plus those collected during the match will result in an error.
- Logic tests for validation rules are written exactly like inequalities in math. Any entry that breaks this rule will raise an error.


Setting Fields to Allow Decimals
This function is useful for fields specifying ratings or coordinates (e.g. Driver skill, X, or Y)- First, switch to design view.
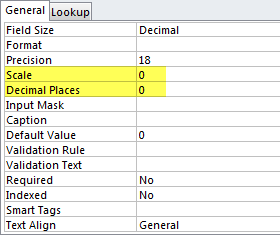
- Under the General tab, change the Field Size option to Decimal.
- Once Field Size is changed to Decimal, enter the desired number of decimal places in the Scale and Decimal Places fields.


Adding Shortcuts to the Entry Form
Entry form shortcuts save time during data entry.- Open a form and switch to layout view in the bottom right corner.
- Select the label of the field for which you would like to create a shortcut.
- Input an ampersand (&) in front of the word selected.
- The first letter of the label should now be underlined which indicates a shortcut.
- Now by pressing Alt+[underlined letter] while entering data, the cursor will jump to that field. Creating shortcuts on the last field is a great way to accelerate entry of teams with little match data.


